Primary Series

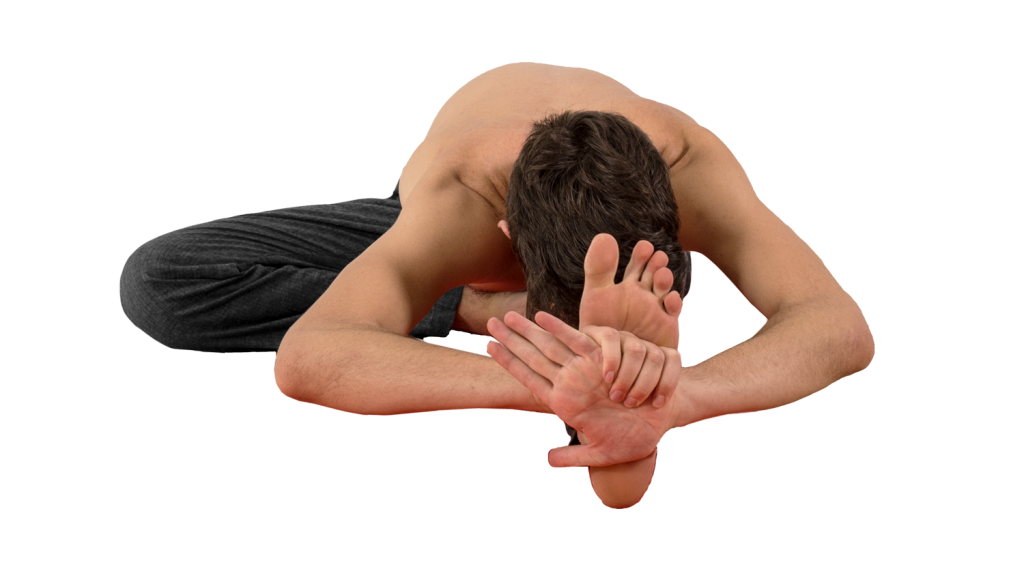
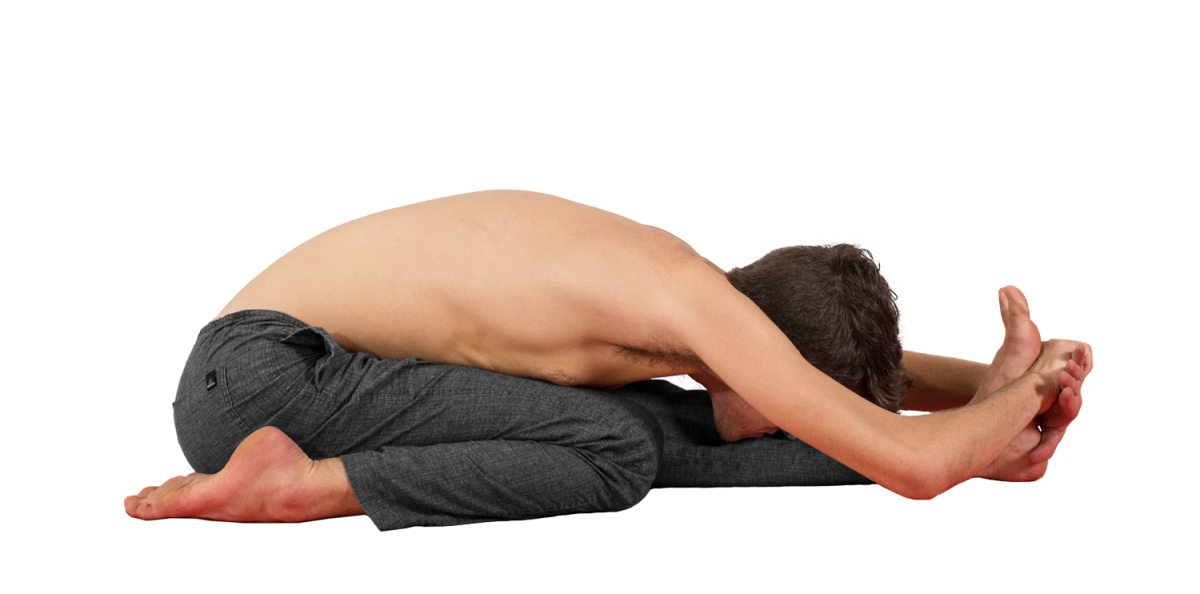
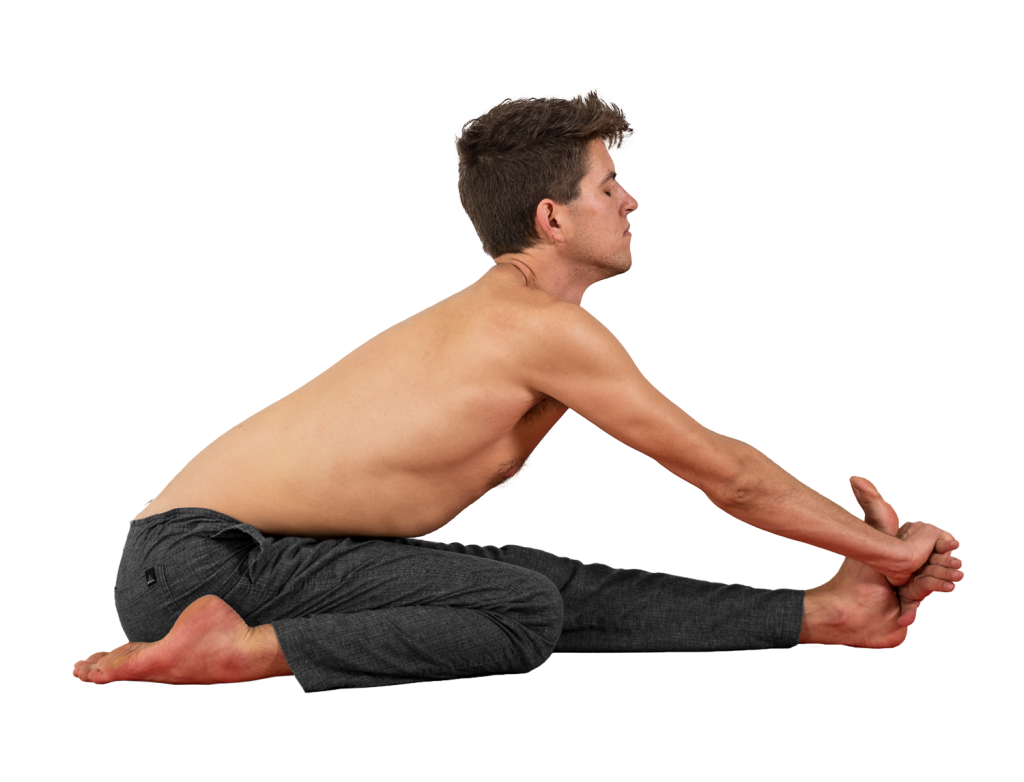
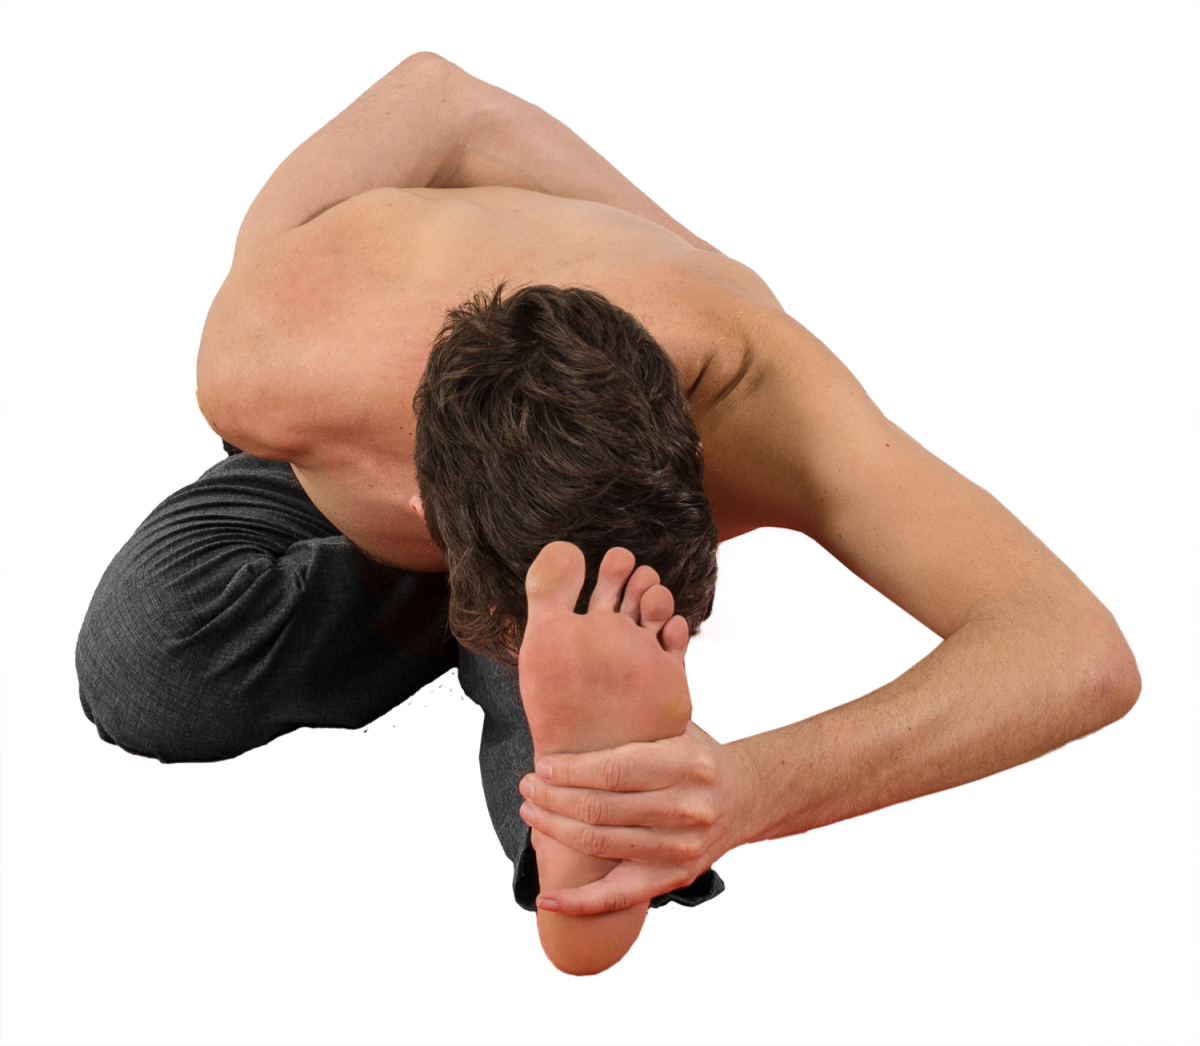
Janu Sirsasana A

Janu Sirsasana A

  • Janu: Knee
  • Sirsa: Head
  • Asana: Pose

Janu Sirsasana A is the eleventh pose of the primary series, and the sixth seated pose. There are three variations of Janu Sirsasana (A, B, C) which differ in foot placement.

The following is a discussion of the position on the right side, as pictured. As an asymmetrical posture, it must be repeated on the left side.

FOCUS ON…

Janu Sirsasana is a “hip opener,” lengthening the muscles of the inner thigh and groin. The action of the straight leg is that of Paschimottanasana, while the action of the bent leg is to rotate externally at the thighbone (similar to that of Trikonasana). This serves to create freedom in the pelvis, by fostering mobility in how the thighbone can move in relation to the pelvis. “Stiffness” can be thought of as a lack of potential movement of the thighbone in the hip socket (acetabulum).

Keep the hips facing straight forward (neutral, or in the same position as Samasthiti/Dandasana). It is very common for the hips to turn toward the right as the right leg is tucked into position, which creates significant distortion in this asana. This is especially common if attempting to make a 90° angle between the femurs. The right leg is anatomically incapable of being at a 90° angle in this position. Instead, allow it to be 60-80°, as much as the shape of your pelvis allows. The angle may increase slightly over time.

There is a slight twisting action in the torso: wrap the length of the spine from root to crown to address the straight leg fully. There can be a tendency for the body to be slightly twisted, drawn back toward the right side, which should be avoided. This is not a posture dedicated to twisting; a ‘counter-twist’ is simply needed to keep facing straight forward.

To enliven the asana, make sure you press the sole of the right foot into the right leg firmly. Though it may be tempting to passively “stretch” and let gravity take over, that is a much less effective strategy. Passive feet and legs are sure signs of vacant asana.

Principles of Forward Folding:

Vinyasa of the Pose

From Sat, jump through and land in Dandasana.

Inhale, bend the right knee into the chest, then open it out to the side; press the thigh and knee firmly into the ground. Press the sole of the right foot into the left thigh. Reach the both hands up and lengthen the abdomen and torso.Janu-Sirsasana-A-prep

Exhale, fold forward and, holding your right wrist, place the hands against the sole of the left foot with the palms facing away from you.*

Inhale and reset, tugging with the strength of the shoulders to pull the chest through the arms, straightening the spine.

Exhale, fold forward fully. This is the state of Janu Sirsasana A; hold for five breaths. Focus on external rotation of the right femur, internal rotation of the left femur. This dynamic encourages movement and awakens the hips.

Janu Sirsasana A

Inhale, sit up and release both hands, placing them to the sides of the hips.

Exhale, jump back and take vinyasa.**

Repeat for the second side.

*Binding the wrist is the preferred method. Alternatives are listed below; if you can hold the wrist, bend the elbows more and more as you gain flexibility to help the torso lengthen.

**Traditionally, vinyasa is taken between sides of asymmetrical postures. If you’re just starting out and building stamina, or have time constraints and require a faster practice, the vinyasa between sides may be omitted

ALTERNATIVES & SOLUTIONS

If the hamstrings feel quite tight, or if you’re unable to sit up straight (the spine is rounding), place a blanket or block beneath the hips. Add additional support if necessary until both the legs and spine can be straightened.

If reaching the toes is challenging or makes you feel crunched, use a strap or towel. Pull the strap with your arms, resist with your feet. This will allow you to feel the interplay between the actions of the arms and the legs that allows the spine to lengthen and the chest to remain full. Otherwise, if you strain yourself to reach the toes, you will likely not be able to find or appreciate the subtleties of the posture. Alternatively, reach to the shin (but do the same pulling action) instead of using a prop.

If you have had knee injury or surgery, and/or feel a pinching sensation when the knee is closed fully in this way, place a rolled up washcloth or piece of fabric behind the knee. When you squeeze the cloth with your knee, the bones of the femur and tibia will be held slightly apart. In the majority of cases, this alleviates or eliminates any pinching sensation or pain. The more severe the injury, the greater amount of cloth should be used. The support can be reduced over time as the joint heals. It’s also helpful when recovering from a knee injury to sit up higher using blankets.

If your bent knee doesn’t touch the ground, you might find it helpful to place a block under the leg so you can find the sensation of pressing down through the leg.

COMMON MISTAKES

Close the knee fully. If the knee is slightly open, for example if the foot is mid-thigh or at the knee instead of at the groin, an unhealthy shear force generated in the knee. This could lead to knee pain, and at the least it will prevent the knee from ever reaching the floor.

Twisting only the upper body or head towards the straight leg shows that the belly and hips are ‘dead,’ or not involved in the pose. Make sure to move from the very low belly.

Triang Mukhaikapada Paschimottanasana

Triang Mukhaikapada Paschimottanasana

  • Triang: Three parts
  • Mukhaikapada: Face to one leg
  • Paschim: West / Behind (Referring to the dorsal or back surface of the body)
  • Uttana: Stretched
  • Asana: Pose

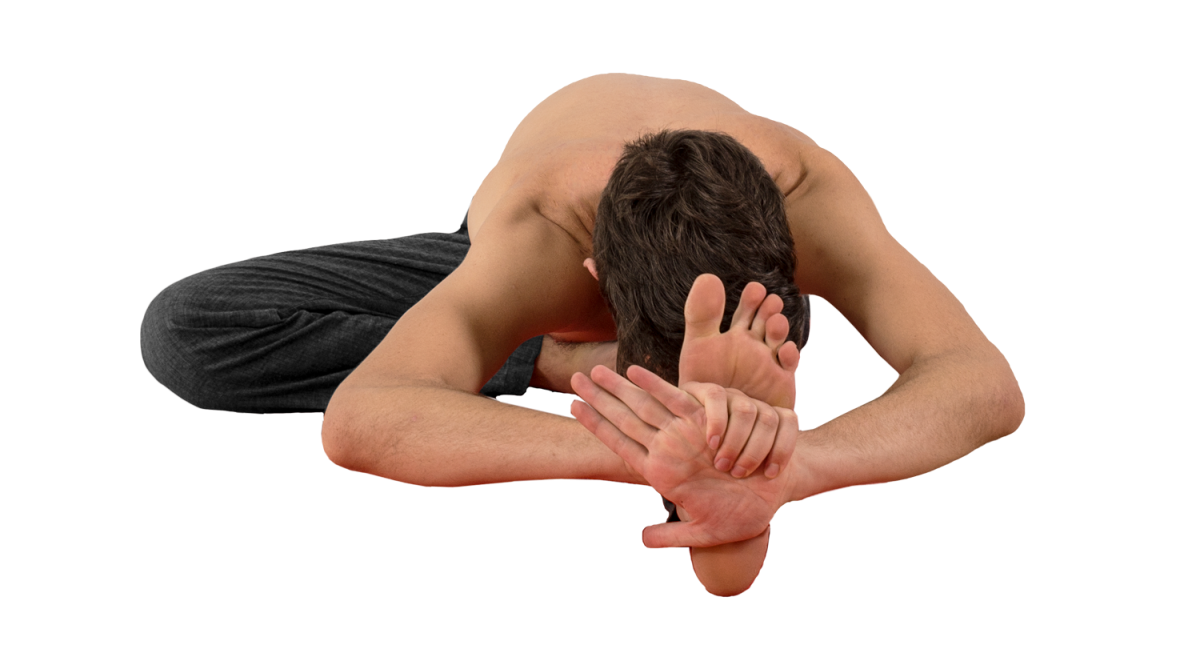
Triang Mukhaikapada Paschimottanasana is the tenth pose of the primary series, and the fifth seated pose.

The following is a discussion of the position on the right side, as pictured. As an asymmetrical posture, it must be repeated on the left side.

FOCUS ON…

I recommend that you close the knee fully (pull the knee to the chest) before moving it to the side, rather than bending while you put it in position. In this way, the knee is more protected against torsion.

If you have large calves, you will likely find it helpful to grab the calf muscle with your hand and pull it to the side as you close your knee, allowing a deeper fold.  Keep the thighbones parallel to one another; the knees may or may not touch depending on your proportions.

Ensure that the top of the foot is fully in contact with the ground, as often the pinky side is lifted slightly. Spread the toes wide and keep the foot active. Note that the foot is to the side of the hips, do not sit on it.

This pose could be a focused lengthening of the quadriceps group, the hamstrings, or both. In any case, make an effort to ground the sitting bones fully, especially on the side of the bent knee.

Asymmetrical postures are often more complicated than their symmetrical counterparts, because you will have to process and coordinate simultaneous but different actions: each leg is actively involved in its own pattern. The straight leg needs to still be doing all the appropriate actions of a forward fold as in Paschimottanasana, while the bent knee has its pattern of lengthening the quadricep and sinking the sitting bone low.

Don’t forget the principles of forward folding. It may feel different here, especially if the quadriceps are tight, but especially focus on maintaining length on the front midline of the body, from the navel to the sternum.

Principles of Forward Folding:

Vinyasa of the Pose

From Sat, jump through and land in Dandasana.

Inhale, place the right foot along the outer edge of the right hip. Reach the both hands up and lengthen the abdomen and torso.

Exhale, fold forward and, holding your right wrist, place the hands against the sole of the left foot with the palms facing away from you.*

Inhale and reset, tugging with the strength of the shoulders to pull the chest through the arms, straightening the spine.

Triang Mukhaikapada Paschimottanasana


Exhale, fold forward fully. This is the state of the pose; hold for five breaths.

Triang Mukhaikapada Paschimottanasana

Inhale, sit up and release both hands, placing them to the sides of the hips.

Exhale, jump back and take vinyasa.**

Repeat for the second side.

*Binding the wrist is the preferred method. Alternatives are listed below; if you can hold the wrist, bend the elbows more and more as you gain flexibility to help the torso lengthen.

**Traditionally, vinyasa is taken between sides of asymmetrical postures. If you’re just starting out and building stamina, or have time constraints and require a faster practice, the vinyasa between sides may be omitted

ALTERNATIVES & SOLUTIONS

If the hamstrings feel quite tight, or if you’re unable to sit up straight (the spine is rounding), place a blanket or block beneath the hips. Add additional support if necessary until both the legs and spine can be straightened.

If reaching the toes is challenging or makes you feel crunched, use a strap or towel. Pull the strap with your arms, resist with your feet. This will allow you to feel the interplay between the actions of the arms and the legs that allows the spine to lengthen and the chest to remain full. Otherwise, if you strain yourself to reach the toes, you will likely not be able to find or appreciate the subtleties of the posture. Alternatively, reach to the shin (but do the same pulling action) instead of using a prop.

If you feel like you’re tipping over to one side—towards the straight leg—place a block or blanket only under the hip of the straight leg. Use enough support that the pelvis feels level. You need to be able to find a sense of rootedness or heaviness through the sitting bone on the bent-knee side.

If you have had knee injury or surgery, and/or feel a pinching sensation when the knee is closed fully in this way, place a rolled up washcloth or piece of fabric behind the knee. When you squeeze the cloth with your knee, the bones of the femur and tibia will be held slightly apart. In the majority of cases, this alleviates or eliminates any pinching sensation or pain. The more severe the injury, the greater amount of cloth should be used. The support can be reduced over time as the joint heals. It’s also helpful when recovering from a knee injury to sit up higher using blankets.

COMMON MISTAKES

The most common mistake is not using one of the alternatives listed above when it is necessary to do so.

If you are fairly flexible—able to have both sitting bones on the ground without props—be sure that you’re not leaning towards the bent knee, or curving to the side. Keep your weight equal between the sitting bones, and make sure both legs are participating in the combination of strength and lengthening required of them.

Ardha Baddha Padma Paschimottanasana

Ardha Baddha Padma Paschimottanasana

  • Ardha: Half
  • Baddha: Bound
  • Padma: Lotus
  • Paschim: West / Behind (Referring to the dorsal or back surface of the body
  • Uttana: Stretched
  • Asana: Pose

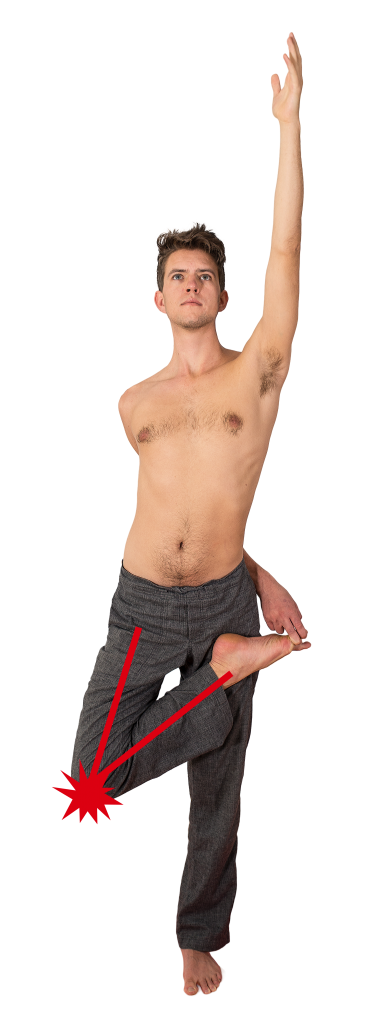
Ardha Baddha Padma Paschimottanasana is the ninth pose of the primary series, and the fourth seated pose. It is essentially the same as Ardha Baddha Padmottanasana, simply seated.

The following is a discussion of the position on the right side, as pictured. As an asymmetrical posture, it must be repeated on the left side.

This posture requires the leg to be placed in Lotus posture. If your leg can’t be comfortably placed in Lotus, don’t add this posture until you have given more time to and had the benefit of the Marichyasana and Padmasana positions. Binding the foot requires significant shoulder flexibility, and the practice of this posture serves to lengthen the Pectoralis muscles and bring the shoulders into a more healthful alignment. The position of the foot—pressing into the lower belly—also teaches the release of the rectus abdominis muscle during forward folding.

As in any of the Lotus family, be sure to keep the foot and ankle strong and contiguous with the leg. Allowing the ankle to “cave in” (inversion of the foot/ankle) will lead to ankle strain or a sprain.

FOCUS ON…

Principles of Forward Folding:

It is helpful to use the entire torso to your advantage. Let your torso follow your arm in the twist as you reach back to bind your big toe. Once you’ve taken hold, try and leave your arm and shoulder where they are in space and twist the torso back to center, effectively lengthening the muscles of the collarbone and the chest.

Be sure you don’t allow the binding arm and bound leg to become dormant. Pull with the hand and resist with the foot; this interplay will contribute to the strength, lift, and integrity of the posture.

Vinyasa of the Pose

From Sat, jump through and land in Dandasana.

Inhale, place the right leg in half lotus.* Reach back and bind with the first two fingers of your right hand. Reach the left hand up and lengthen the abdomen and torso.

Exhale, fold forward and talk hold of the outer edge of the left foot with the left hand.

Ardha-Baddha-Padma-Paschimottanasana-Prep

Inhale and reset, tugging with the strength of the shoulders to pull the chest through the arms, straightening the spine.

Exhale, fold forward fully. This is the state of the pose; hold for five breaths.
Ardha-Baddha-Padma-Paschimottanasana

Inhale, sit up and release both hands, placing them to the sides of the hips.

Exhale, jump back and take vinyasa.**

Repeat for the second side.

*Some practitioners require additional time to get the leg properly placed in Lotus. This is okay; take your time. After you have gained some experience, try and maintain the count and move with the breath as described.

**Traditionally, vinyasa is taken between sides of asymmetrical postures. If you’re just starting out and building stamina, or have time constraints and require a faster practice, the vinyasa between sides may be omitted.

ALTERNATIVES & SOLUTIONS

If the hamstrings feel quite tight, or if you’re unable to sit up straight (the spine is rounding), place a blanket or block beneath the hips. Add additional support if necessary until both the legs and spine can be straightened.

If you have had knee injury or surgery, and/or feel a pinching sensation when the knee is closed fully in this way, place a rolled up washcloth or piece of fabric behind the knee. When you squeeze the cloth with your knee, the bones of the femur and tibia will be held slightly apart. In the majority of cases, this alleviates or eliminates any pinching sensation or pain. The more severe the injury, the greater amount of cloth should be used. The support can be reduced over time as the joint heals.

COMMON MISTAKES

I do not recommend trying to learn to do lotus in this posture. I see practitioners trying to do this with the foot halfway up the thigh instead of at the hip crease. This alignment places a great deal of shearing pressure in the knee and I do not think it gives much benefit. In the meantime, Janu Sirsasana A is a suitable alternative. Save your effort for Marichyasana or other poses that are more effective and less risky.

Purvottanasana

Purvottanasana

  • Purva: East
  • Uttana: Stretched
  • Asana: Pose

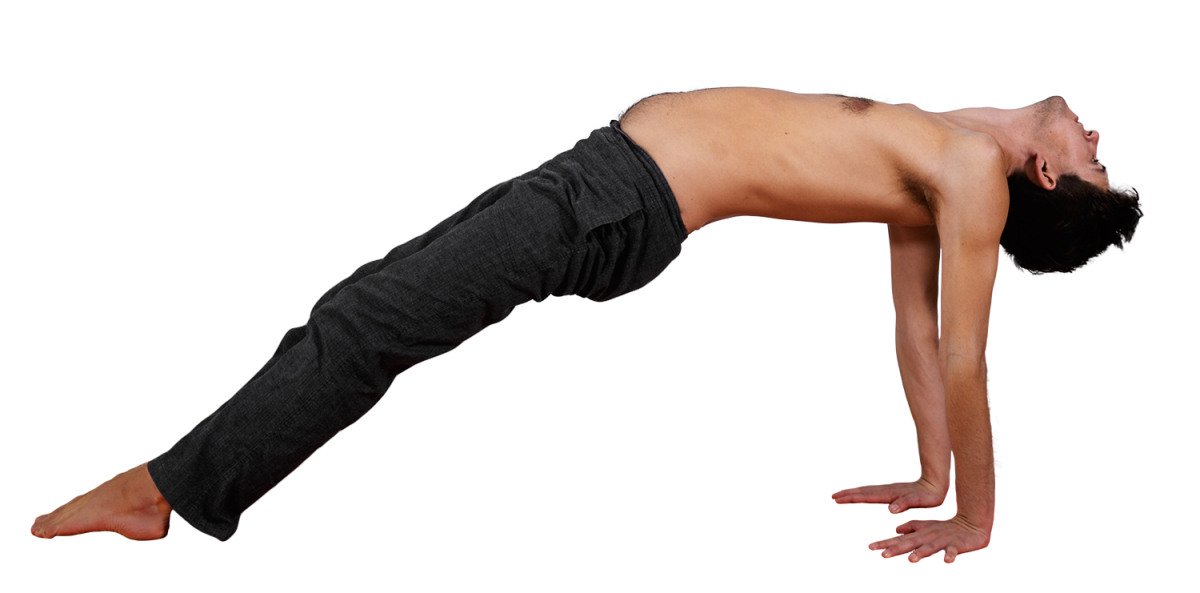
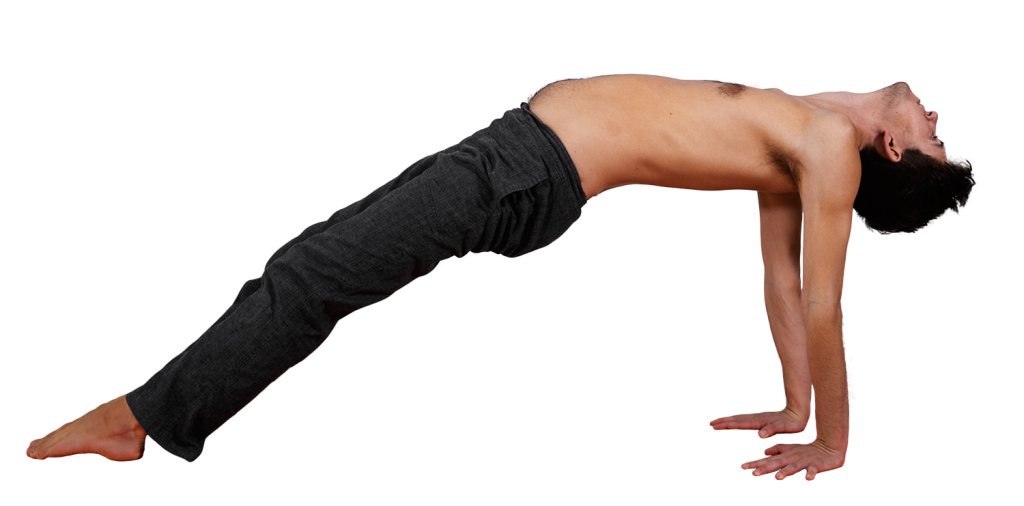
Purvottanasana is the eighth pose of the primary series, and the third seated pose. It is one of the best postures in the seated primary series to develop hamstring and backbending strength.

FOCUS ON…

This posture is a backbend, albeit a mild one. The focal point of Purvottanasana is to lift the hips as high as possible. As a result, a gentle backbend forms, mostly in the lumbar spine.

The hands are placed beneath the shoulders, with the fingers pointed forward. The palms of the hands and the soles of the feet are to be fully in contact with the mat.

Use the legs to full effect, especially recruiting the hamstrings and gluteal muscles to help lift.

The gaze is down the length of the nose, which is in the direction of the ceiling with the head back. Be sure to actively extend the neck—simply surrendering the weight of the head to gravity can create a feeling of pinching or discomfort in the neck.

Vinyasa of the Pose

From Sat, jump through and land in Dandasana.

Still exhaling, place your hands roughly 8 inches behind your hips, shoulder width apart.

Inhale, lift the hips high and arch the back. Five breaths; this is the state of the pose.

purvottanasana

Exhale, set down. Take Vinyasa.

ALTERNATIVES & SOLUTIONS

If you’re unable to lift enough that the soles of the feet touch the ground, bend one knee slightly. The extra power from that leg will help you lift much higher. Without the feet on the ground, you’ll be working much harder without seeing significant benefit. Switch which leg you bend, either five breaths on each side, or right leg one day and left the next day. After some practice, you’ll be able to have the feet on the ground with the legs straight.

purvottanasana with one knee bent

If you have shoulder injury, for example a torn bicep tendon, lift only as much as you can without pain. Keep one or both knees bent. Experiment with turning the hands so the fingers point backwards, or placing the hands on blocks. Don’t push too hard or too quickly—Purvottanasana is not especially forgiving to injured shoulders.

If there is neck pain with the head back, take the chin to the chest and gaze towards the navel.

COMMON MISTAKES

There is relatively little technique, here. The most common errors are errors of omission: hyperextension of the elbows, letting the hips sag, or not fully activating the legs and feet.

If you are having trouble finding height in this posture, place your feet against a wall so that your toes are up the wall but the ball of the foot is on the floor. This will allow you to push and get the feeling of lift and activation of the legs.

Paschimottanasana

Paschimottanasana

  • Paschim: West / Behind (Referring to the dorsal or back surface of the body)
  • Uttana: Stretched
  • Asana: Pose

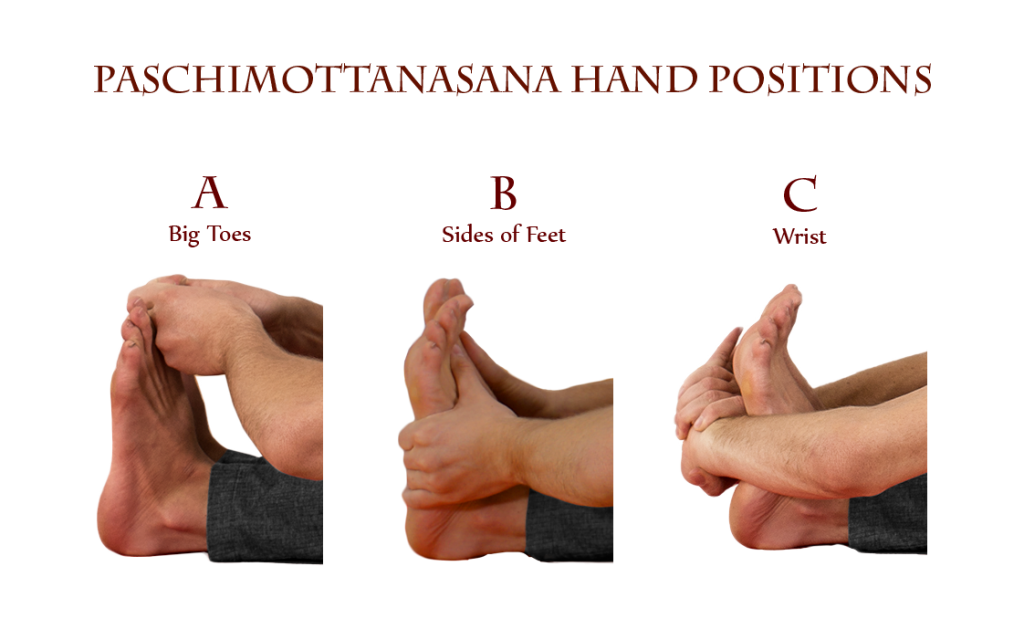
Paschimottanasana is the seventh pose of the primary series, and the second seated pose. Paschimottanasana has 3 progressively deeper variations: A, B, and C, distinguished by the position of the hands.

Hand positions

FOCUS ON…

Principles of Forward Folding:

Vinyasa of the Pose

From Dandasanainhale and reach upwards with the arms, using that movement to lengthen the belly and torso even further. Make sure that the legs are still participating.

Paschimottanasa-Prep

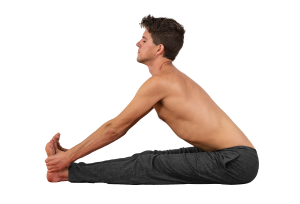
Exhale, and take hold of the big toes with the first two fingers of each hand.

Inhale and reset, tugging with the strength of the shoulders to pull the chest through the arms, straightening the spine.

Inhale and lift

Exhale and fold fully, still pulling with the arms. Resist with the feet, pressing the balls of the feet forward and spreading the toes. This is the state of Paschimottanasana A; hold here for five breaths.

Paschimottanasa-A

After five breaths, inhale and sit upright until the arms are straight.

Exhaling, grasp the outer edges of the feet with the fingers such that the ring fingers are just above the heels. Place the thumbs on the base of the big toes.

Inhale, pull with the fingers and pressing with the thumbs, wrapping the outer edges of the feet back and pressing the roots of the big toes forward as you lift the heart through the arms.

Paschimottanasa-B-Prep

Exhaling, fold forward. This is the state of Paschimottanasana B; hold here for five breaths. Continue pulling with the fingers and pressing with the thumbs to wrap the outer edges of the feet back and press the roots of the big toes forward.

Paschimottanasa-B Variation

After five breaths, inhale and sit upright until the arms are straight.

Exhaling, grasp either wrist with the opposite hand.

Inhale and reset, tugging with the strength of the shoulders to pull the chest through the arms, straightening the spine.

Inhale and Reset (C)

Exhale, and fold forward. This is the state of Paschimottanasana C; hold here for five breaths.

Paschimottanasana C Variation

Inhaling, sit upright.

Exhaling, release the arms, placing the hands just forward of the hips. Take Vinyasa.

ALTERNATIVES & SOLUTIONS

If the hamstrings feel quite tight, or if you’re unable to sit up straight (the spine is rounding), place a blanket or block beneath the hips. Add additional support if necessary until both the legs and spine can be straightened.

If reaching the toes is challenging or makes you feel crunched, use a strap or towel. Pull the strap with your arms, resist with your feet. This will allow you to feel the interplay between the actions of the arms and the legs that allows the spine to lengthen and the chest to remain full. Otherwise, if you strain yourself to reach the toes, you will likely not be able to find or appreciate the subtleties of the posture.

Add the variations only as they become necessary; if you’re using the strap, only one variation is possible. Stay for additional breaths. Only add B variation after A (with no strap) is comfortable. Only add C variation after B is comfortable.

COMMON MISTAKES

It challenges coordination to move from the hips rather than the upper body in this pose. Many simply struggle to reach their toes, or to touch their head to the legs. That is not the goal. Discover and master the fundamental actions of the forward fold.

Do not tuck the pelvis & do not slump. Gravity will not do your work for you.

Dandasana

Dandasana

  • Danda: Staff / Stick
  • Asana: Pose

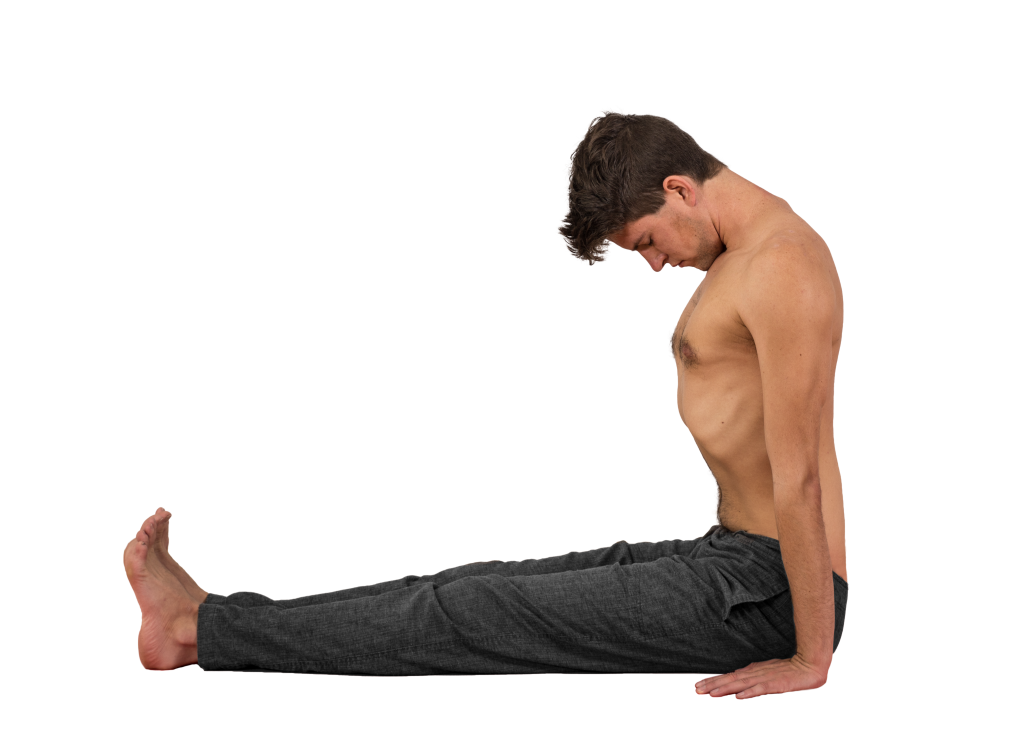
Dandasana is the sixth pose of the primary series, and the first seated pose.

Dandasana is performed before each seated posture as part of the vinyasa to seated. As part of the vinyasa to Paschimottanasana, it is performed for five breaths. As part of the vinyasa to other seated poses, it is not held.

Focus On…

This pose establishes the blueprint for all forward folds and teaches the principles of forward folding that will be revisited frequently during the primary series. For those well established in the method of forward fold alignment, it provides a moment of introspection and an opportunity to commune with the bandha.

Principles of Forward Folding:

  • Fold, don’t curl. Ideally, a forward fold is a very shallow flexion, rather than a deep rounding of the spine. Forward folding is like folding a piece of paper: rather than head-to-knees, the belly comes down first, the ribs follow, then the head last.
  • The movement of forward folds comes from the hips. Specifically, from an anterior tilt of the pelvis. The hips move first, and the ribs and head follow along, similar to the movement of a whip. If you slump into a forward fold, or move from the upper body, you are wasting your time.
  • Keep strong, active hamstrings: dig/drag the heels down into the mat so there’s a sense of strength and depth at the backs of the knees.Draw the sitting bones together. Spread the toes and press through the root of the big toe. Flaccid legs and pelvic floor greatly increase risk of injury.
  • Internally rotate the thighbones. If only one leg is straight, as in the asymmetrical postures, internally rotate that leg.
  • Do not clench the abdominal muscles. The belly ought to be long and soft, with a sense of hollowing, or the belly falling back against the spine. Engaging the rectus abdominus shortens the torso, restricts movement, and places potentially harmful pressure on the spine.
  • Pull the shoulders back, and broaden the chest. Keep the collarbones long and the shoulders back for the entire duration of the asana.

These principles are common to all forward folds. Each forward fold also has its own distinguishing actions and characteristics.

In Dandasana, the arms are straight and the hands press into the floor alongside the hips. The spine is fully vertical, and the chin comes to rest on the manubrium, between the collarbones. If your neck doesn’t allow for this much movement, don’t open your mouth to try and touch chin and chest, just be patient.

This pose, though simple in appearance, is not a chance to relax. Every part of the body is effortful.

Vinyasa of the Pose

Transition to seated, exhaling.

Inhale, and press the hands into the floor, sitting fully upright and working the actions of forward folding as described above. This is the state of the pose; spend five breaths here.

Dandasana

Exhale, and release. Transition directly to Paschimottanasana.

Alternatives & Solutions

If the hamstrings feel quite tight, or if you’re unable to sit up straight (the spine is rounding), place a blanket or block beneath the hips. Add additional support if necessary until both the legs and spine can be straightened.

Common Mistakes

Do not allow yourself to slump, or the pelvis to rotate posteriorly. Do not be hasty here; be sure you take the time to figure out the workings of this pose before you move on to other forward folds.

Virabhadrasana B

Virabhadrasana B

  • Virabhadra – Distinguished Hero
  • Asana – Pose

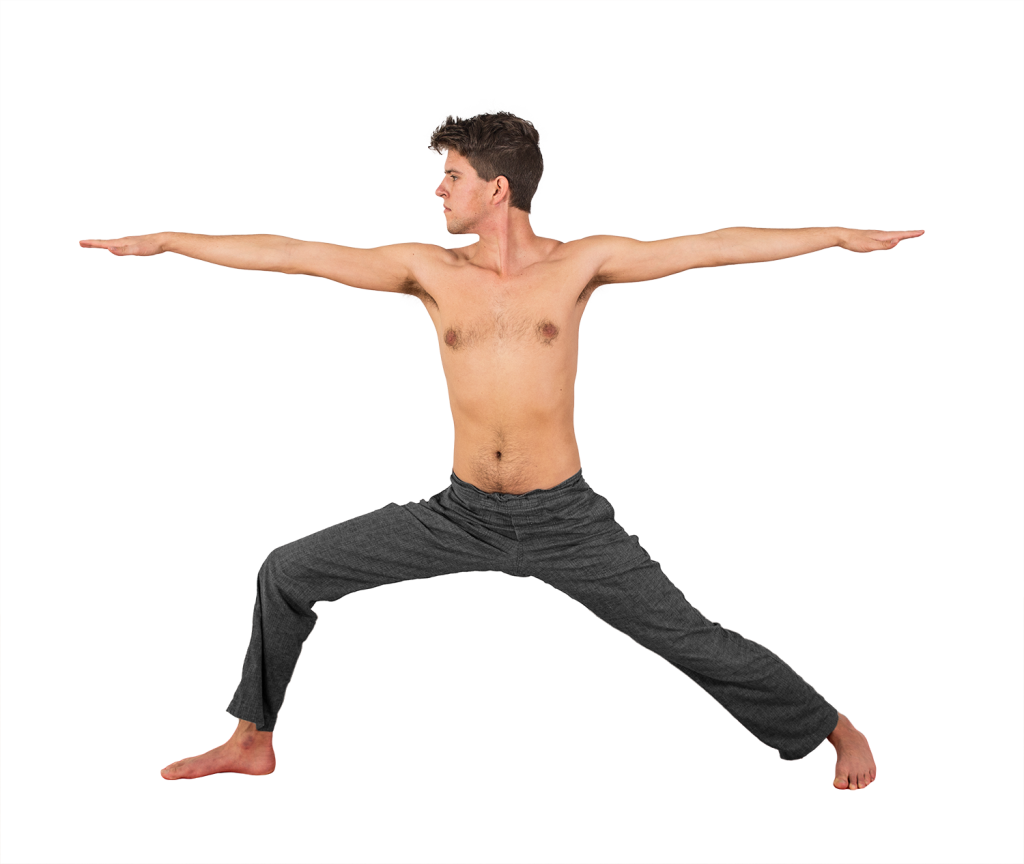
Virabhadrasana B is the fifth pose of the primary series.

FOCUS ON…

The work of this posture is very similar to that of Virabhadrasana A. The primary difference is that now the legs rotate externally, rather than internally, and the arms find a new position parallel to the floor.

The front knee is bent to approximately 70-90 degrees, such that the tibia is perpendicular to the ground in every dimension. The back leg is fully straightened, while the back foot is at a 90 degree angle to the front foot.

footprints


The upper body is not only vertical, but lifting. Rather than leaning back at the level of the chest or shoulders to create the illusion of verticality, draw upwards from the deep low belly and the waistline.

Keep the pelvis relatively neutral. Avoid excessive anterior or posterior tilting. Neutral does not mean passive or relaxed, however. A strong anterior tilt is typical while learning the pose, especially if the inner thigh muscles (adductors) are short. This means you’ll need to make the action of posterior rotation until the pelvis comes to an active neutral, which will be quite effortful.

In order for the pelvis and legs to form a stable and powerful foundation, both thighs must be rotated externally. Be sure to press the center of the heel and the outer edge (pinky edge) of the back foot firmly into the mat, otherwise the foot and ankle might ‘crumple’ inwards, leaving only the big toe side in contact with the mat.

With an air of nobility, gaze over the spread fingertips.

Vinyasa of the Pose

Exhaling, transition from Virabhadrasana A: Turn the back foot from 45 to 90 degrees, turn the hips and torso to the side, and spread the arms wide. You may need to widen your stance slightly. Hold here for five breaths; this is the state of the pose.

virabhadrasana-b

Inhaling, press firmly through the left heel and straighten the left leg. Move directly to the second side by pivoting on the heels. Do not move the arms and torso during the transition.

Exhaling, bend the right knee. Five breaths here; this is the state of the pose.

Inhaling, straighten the right knee by pressing firmly into the heel. Sweep the arms up overhead and turn to face the front of the mat, allowing the back heel to rise.

Exhaling, place the hands down to either side of the right foot and step or float back to Catvari.

Continuing the Surya Namaskara form, inhale to Panca.

Exhale, Sat. Still exhaling, transition to Dandasana.

Alternatives & Solutions

In the case of shoulder or neck injury, place the hands on the hips. If there is pain in the hips or knees, shorten the stance as necessary until recovery.

Common Mistakes

  • It can be difficult to tell exactly where your arms are in space. Often, the back arms is dropping and the front arm is lifted high. The arms ought to be on a level with the shoulders; check the position of the arms visually as you move into the pose, or ask your teacher or a friend to help make your arms level.
  • It can also be tempting to lean forward, over the bent leg. Instead, stay upright so the spine is fully vertical.
  • The back foot easily becomes ungrounded. Even though the front leg is the natural focal point, bring your attention into the back leg and the back heel, making it as strong and energetic as possible, pressing down into the earth.
Virabhadrasana A

Virabhadrasana A

  • Virabhadra – Distinguished Hero
  • Asana – Pose

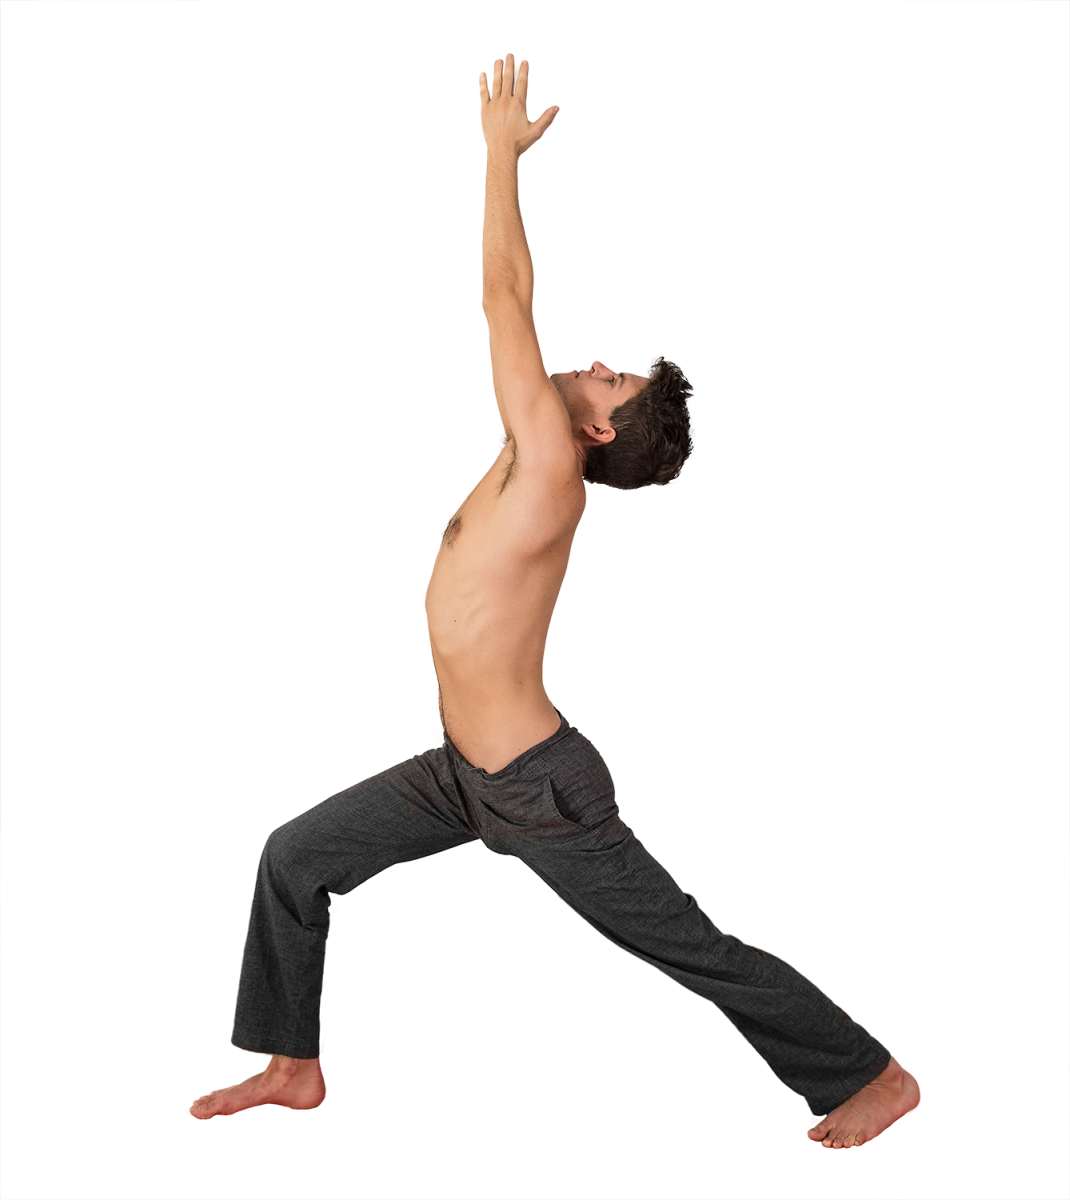
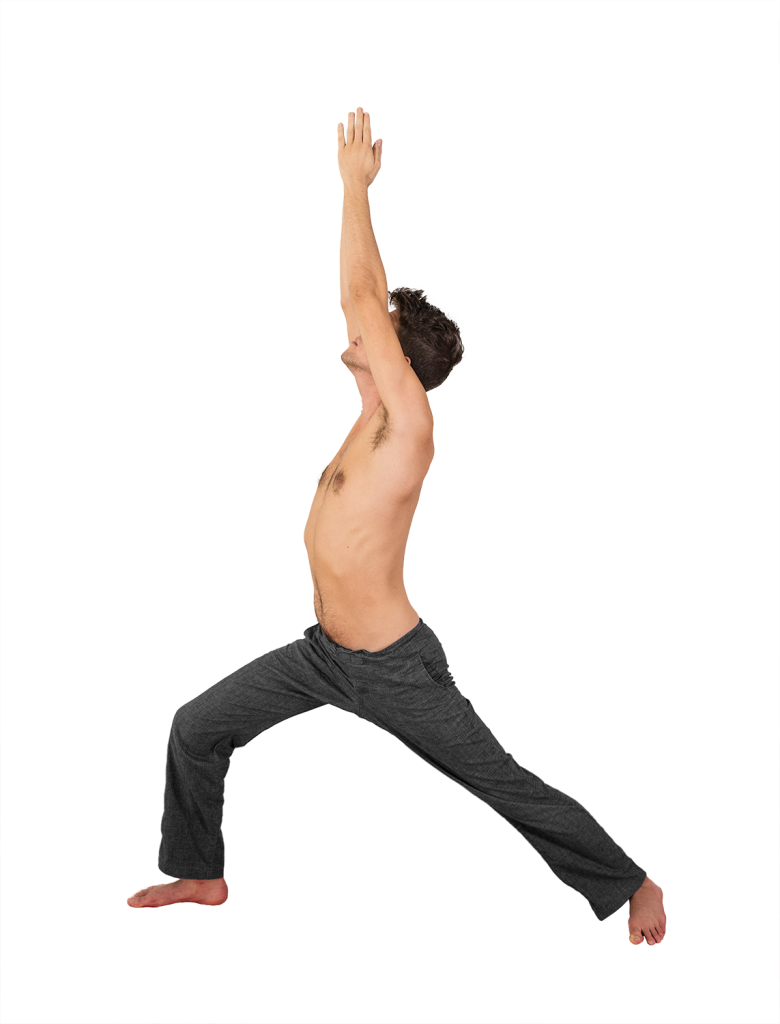
Virabhadrasana A is the fourth pose of the primary series.

Focus On…

The front knee is bent to approximately 70-90 degrees, such that the tibia is perpendicular to the ground in every dimension. The back leg is fully straightened. The upper body is not only vertical, but lifting. Rather than leaning back at the level of the chest or shoulders to create the illusion of verticality, draw upwards from the deep low belly and the waistline.

Keep the pelvis relatively neutral. Avoid excessive anterior or posterior tilting. Neutral does not mean passive or relaxed, however. A strong anterior tilt is typical while learning the pose, due to the position of the back leg and limited quadricep length. This means you’ll need to make the action of posterior rotation until the pelvis comes to an active neutral, which will be quite effortful.

In order for the pelvis and legs to form a stable and powerful foundation, both thighs must be rotated internally. This can seem paradoxical on the back leg, as an interior rotation can put too much weight on the big toe or peel the sole of the foot off the ground. To address this, be sure to press the center of the heel and the outer edge (pinky edge) of the back foot firmly into the mat while you rotate the thigh internally.

Stance Footprints

Press the palms together firmly, and take the head behind the line of the arms. Avoid lacing the fingers together, or letting the shoulders grip around the neck. Reach upwards as much as you can, using the motion of the arms to cultivate length of the torso. Pressing the hands together will allow you to access the side rib musculature (namely, the latissimus dorsi & serratus anterior muscles. This is the area below the armpits). Creating strength in the side ribs is important in a variety of postures, essential to arm balances, and necessary in establishing healthy alignment in the shoulder girdle and neck.

Keep the musculature of the neck supportive by reaching the nose towards the ceiling.

Vinyasa of the pose

Virabhadrasana A follows from the last vinyasa of Utkatasana. From Sat, keep exhaling and step the right foot between your hands.

Inhale and join the palms overhead. Gaze up to the thumbs. This is the state of Virabhadrasana A – Spend five breaths here.

Virabhadrasana A - Warrior I

Without lowering the hands or gaze, exhale, pivot 180 degrees to come into the left side of the pose. Spend five breaths here.

Exhale, transition to Virabhadrasana B.

Alternatives & Solutions

If you have a neck injury, or limited mobility in your shoulders, spread the hands shoulder width apart. Keep the neck upright rather than tilting the head back to gaze upwards. Over time, however, work towards the proper head position. It is important to return the neck to a fully functional range of motion.

If the heel of the back foot doesn’t reach the ground, or there is pain in the achilles tendon or knee, place a block beneath the heel while maintaining the 45 degree angle. Over time, reduce the height of the support.

Common Mistakes

Avoid letting the knee wander from its proper place directly over the ankle. If it has gone from side to side, work the rotation of the thigh until it comes back into place. If it has strayed over the toes or beyond, increase the length of your stance. If it has not reached the ankle, bend the knee more. The tibia ought be perpendicular to the floor. 

The pelvis will typically rotate towards the open side — to the left with the left leg back, right with the right leg back. The result is a twisted conglomeration of Virabhadrasana variations A and B. Use the hands to find the hips, and wrap the the pelvis towards the front leg. Use the inner thigh muscles. If the back heel lifts from the ground, place a block beneath the heel until flexibility increases.

In the photo below, observe that the back foot is perpendicular to the front, rather than 45 degrees. This could be due to inattention or a tight Achilles Tendon/Calf musculature. As a result, the entire trunk (hips, ribs, shoulders) is distorted, twisting towards the camera. The head is also crunched between the arms, disallowing full shoulder extension. In whole, the posture is lacking in integrity and lift.


virabhadrasana-a-mistake

An example of ineffective alignment

Utkatasana

Utkatasana

  • Utkata: Fierce / Furious / Awkward
  • Asana: Pose

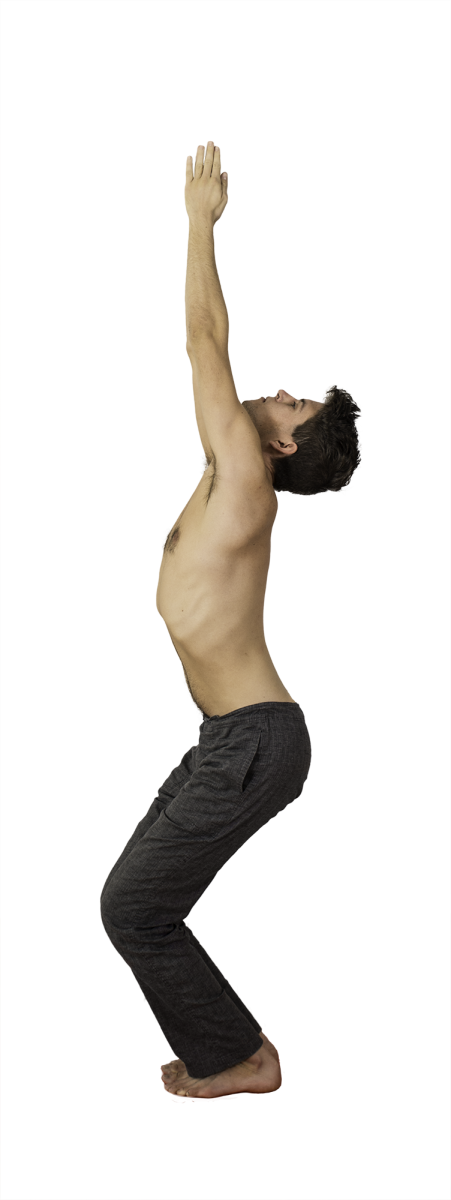
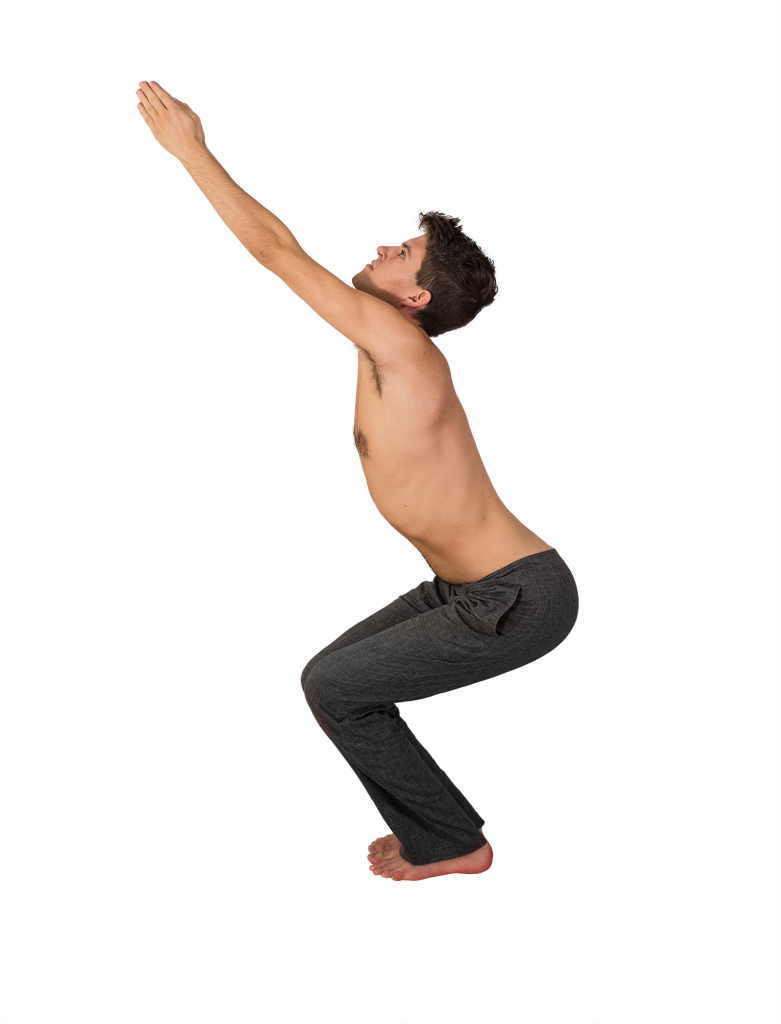
Utkatasana is the third pose of the primary series of Ashtanga Vinyasa.

This pose builds strength of the legs and shoulders, and demands flexibility of the shoulders.

Focus on…

Squeeze the knees together, and bend the knees as much as possible while maintaining the verticality of the pose. Bending the knees too much will make the torso and arms lean forward in order to counterbalance, undermining the integrity of the position.

Keep the pelvis relatively neutral. Avoid excessive anterior or posterior tilting.

Press the palms together firmly, and take the head behind the line of the arms. Avoid lacing the fingers together, or letting the shoulders grip around the neck. Reach upwards as much as you can, using the motion of the arms to cultivate length of the torso. Pressing the hands together will allow you to access the side rib musculature (namely, the latissimus dorsi & serratus anterior muscles. This is the area below the armpits). Cultivating strength in the side ribs is important in a variety of postures, essential to arm balances, and necessary in establishing healthy alignment in the shoulder girdle and neck.

Keep the musculature of the neck supportive by reaching the nose towards the ceiling.

Vinyasa of the Pose

This pose is entered through the Surya Namaskara form. (Review these positions here)

From Samasthitiinhale and reach the arms overhead.

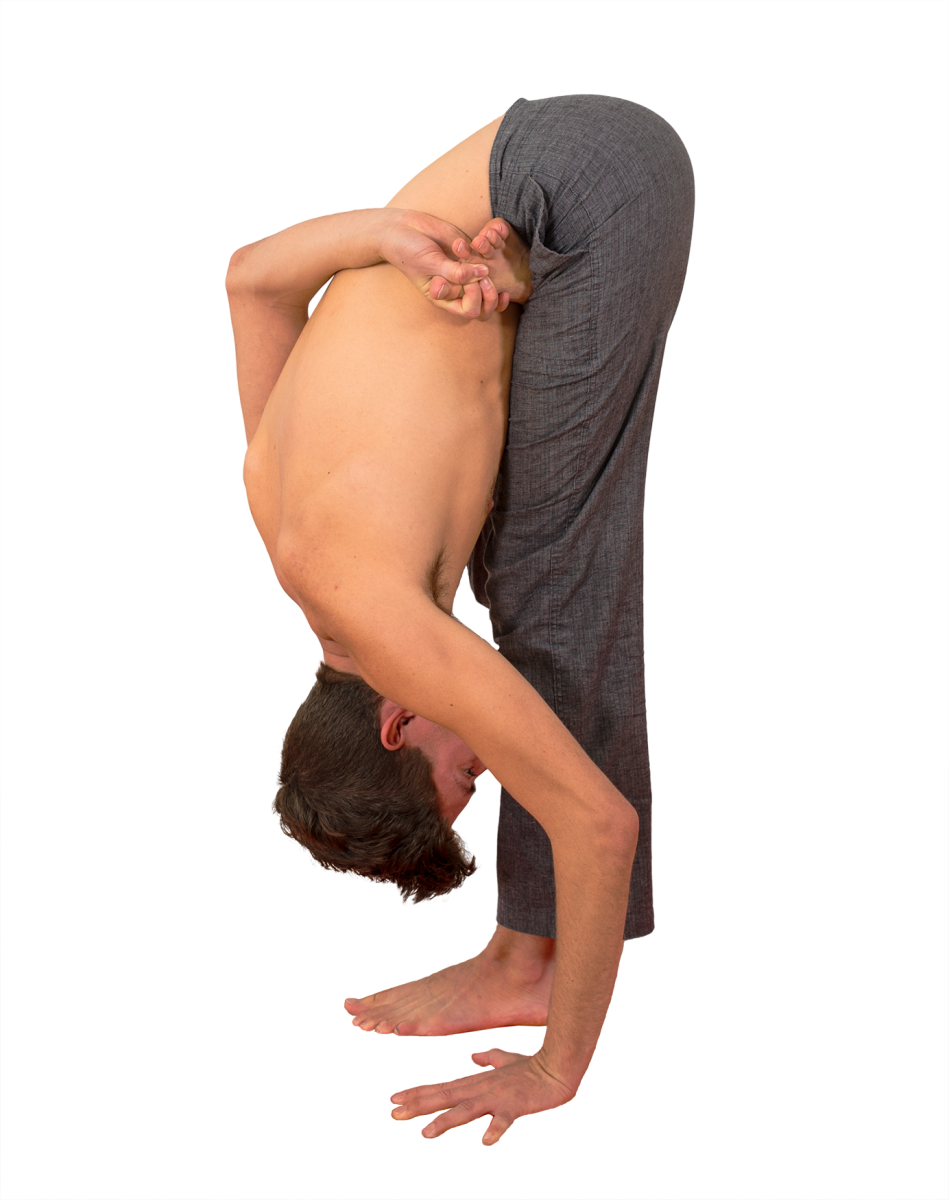
Exhale, and fold forward.

Inhale, look forward and lengthen.

Exhale, jump back to Chaturanga.

Inhale, Urdhva Mukha Svanasana 

Exhale, Adho Mukha Svanasana. While still exhaling, jump or step forward and land with the feet between the hands and the knees bent.

Inhale, join the hands overhead, keeping the knees bent. This is the state of Utkatasana. Take five breaths here.

Utkatasana

Exhale, fold forward and press the hands on the floor.

Inhale, look forward and lengthen.

Exhale, jump back.

Inhale, Urdhva Mukha Svanasana 

Exhale, Adho Mukha Svanasana. From here, step forward into Virabhadrasana A.

Alternatives & Solutions

If you have a neck injury, or limited mobility in your shoulders, spread the hands shoulder width apart. Keep the neck upright rather than tilting the head back to gaze upwards. Over time, however, work towards the proper head position. It is important to return the neck to a fully functional range of motion.

If your hands are shoulder width apart, hold a block lengthwise. Press your palms firmly into the block to activate the side rib muscles (latissimus dorsi & serratus anterior). After several sessions with the block, leave it aside and find the same muscle engagement. Imagine an invisible block between your hands and ‘press’ into it if that is a helpful visualization.

Common Mistakes

Bending the knees excessively can make the body lean forward too much. In the below photo, there is too much hip and knee flexion. Instead, the knees should be straightened until the arms are vertical.

Utkatasana mistake

Don’t place the head between the arms, which prevents elongation of the shoulder joint. Instead, place the head behind the line of the arms.

Don’t allow the arms or legs to do the bare minimum. Instead, squeeze the knees & thighs together, and press the palms together firmly as you spread the fingers and toes.

Ardha Baddha Padmottanasana

Ardha Baddha Padmottanasana

  • Ardha: Half
  • Baddha: Bound
  • Padmottana: Upright Lotus
  • Asana: Pose

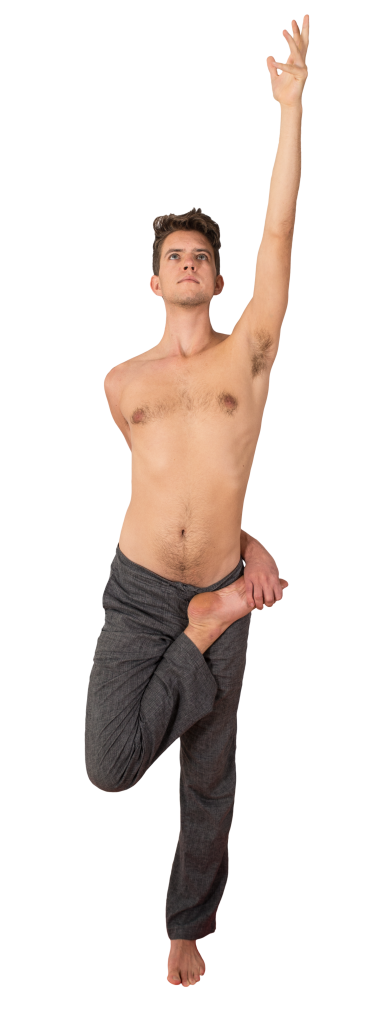
This is the second pose of the primary series.

The following is a discussion of the position on the right side, as pictured. As an asymmetrical posture, it must be repeated on the left side.

This posture requires the leg to be placed in Lotus posture. If your leg can’t be comfortably  placed in Lotus, don’t add this posture until you have given more time to and had the benefit of the Marichyasana and Padmasana positions.

Ardha Baddha Padmottanasana primarily challenges and builds balance, focus, and coordination. Binding the foot requires significant shoulder flexibility, and the practice of this posture serves to lengthen the Pectoralis muscles and bring the shoulders into a more healthful alignment. It also teaches the release of the rectus abdominis muscle during forward folding.

As in any of the Lotus family, be sure to keep the foot and ankle strong and contiguous with the leg. Allowing the ankle to “cave in” (inversion of the foot/ankle) will lead to ankle strain or a sprain.

Vinyasa of the Pose

From Samasthiti, inhale raise your right leg and place it in lotus. Reaching behind your back, bind the right big toe. Make the big toe strong in order to serve as a hook for your fingers. Reach your left hand upwards.

ardha badha padmottanasana prep

Exhale, and fold forward. Place your left hand on the ground alongside the left foot. Gaze at the tip of the nose (with the head down; the shin or wall behind you in the line of sight). This is the state of the pose; hold for five ujjayi breaths.


ardha baddha padmottanasana

Inhale, look forward and lift halfway, coming onto the fingertips.

Exhale and hold.

Inhale, stand upright and reach the left hand upwards (as in first vinyasa)

Exhale, return to Samasthiti smoothly, remaining balanced.

Solutions & Alternatives

If the leg can be placed in lotus, but you have a shoulder injury or tightness that prevents binding the foot, use a strap or cloth to bind. Alternatively, place both hands on the ground.

Common Mistakes

If the knee cannot be fully closed in Lotus, with the foot at the hip crease, do not fold forward. If, due to lack of mobility at the hip, the foot is partway down the thigh, you risk torsion injury to the knee.

ardha badha padmottanasana incorrect

If you do not feel stable standing on one leg, give more time to the other standing postures before attempting this. Popping out of lotus as you lose your balance can injure the knee.

3 of 4
1234