
Triang Mukhaikapada Paschimottanasana
- Triang: Three parts
- Mukhaikapada: Face to one leg
- Paschim: West / Behind (Referring to the dorsal or back surface of the body)
- Uttana: Stretched
- Asana: Pose
Triang Mukhaikapada Paschimottanasana is the tenth pose of the primary series, and the fifth seated pose.
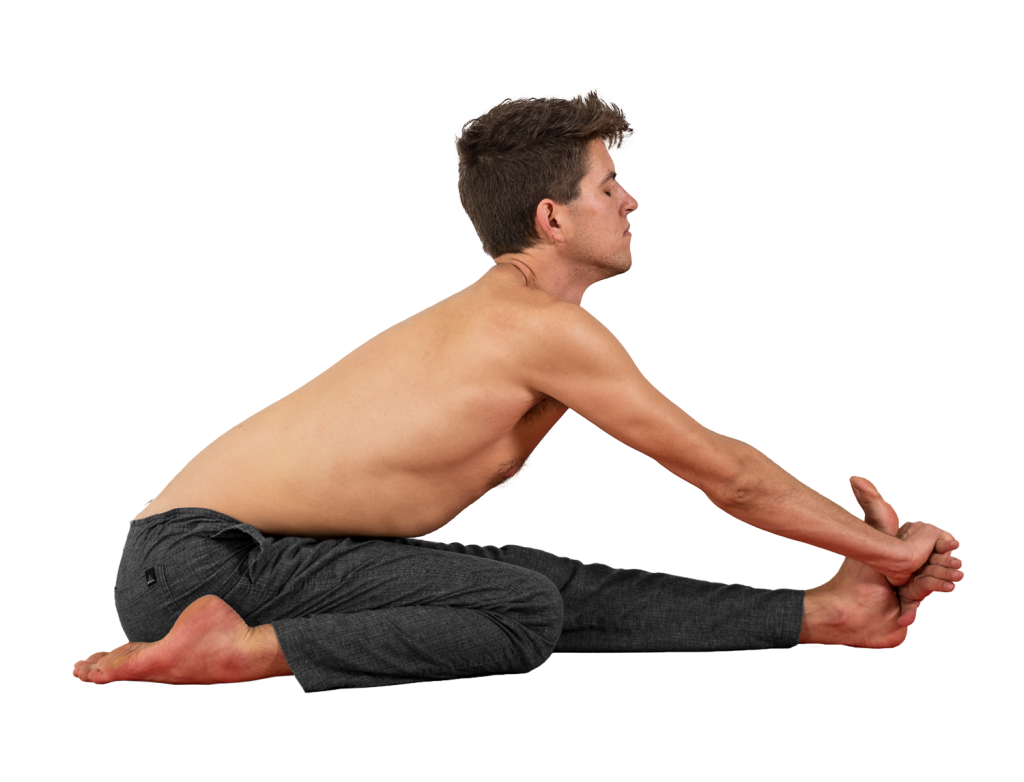
The following is a discussion of the position on the right side, as pictured. As an asymmetrical posture, it must be repeated on the left side.
FOCUS ON…
I recommend that you close the knee fully (pull the knee to the chest) before moving it to the side, rather than bending while you put it in position. In this way, the knee is more protected against torsion.
If you have large calves, you will likely find it helpful to grab the calf muscle with your hand and pull it to the side as you close your knee, allowing a deeper fold. Keep the thighbones parallel to one another; the knees may or may not touch depending on your proportions.
Ensure that the top of the foot is fully in contact with the ground, as often the pinky side is lifted slightly. Spread the toes wide and keep the foot active. Note that the foot is to the side of the hips, do not sit on it.
This pose could be a focused lengthening of the quadriceps group, the hamstrings, or both. In any case, make an effort to ground the sitting bones fully, especially on the side of the bent knee.
Asymmetrical postures are often more complicated than their symmetrical counterparts, because you will have to process and coordinate simultaneous but different actions: each leg is actively involved in its own pattern. The straight leg needs to still be doing all the appropriate actions of a forward fold as in Paschimottanasana, while the bent knee has its pattern of lengthening the quadricep and sinking the sitting bone low.
Don’t forget the principles of forward folding. It may feel different here, especially if the quadriceps are tight, but especially focus on maintaining length on the front midline of the body, from the navel to the sternum.
Principles of Forward Folding:
Vinyasa of the Pose
From Sat, jump through and land in Dandasana.
Inhale, place the right foot along the outer edge of the right hip. Reach the both hands up and lengthen the abdomen and torso.
Exhale, fold forward and, holding your right wrist, place the hands against the sole of the left foot with the palms facing away from you.*
Inhale and reset, tugging with the strength of the shoulders to pull the chest through the arms, straightening the spine.
Exhale, fold forward fully. This is the state of the pose; hold for five breaths.

Inhale, sit up and release both hands, placing them to the sides of the hips.
Exhale, jump back and take vinyasa.**
Repeat for the second side.
*Binding the wrist is the preferred method. Alternatives are listed below; if you can hold the wrist, bend the elbows more and more as you gain flexibility to help the torso lengthen.
**Traditionally, vinyasa is taken between sides of asymmetrical postures. If you’re just starting out and building stamina, or have time constraints and require a faster practice, the vinyasa between sides may be omitted
ALTERNATIVES & SOLUTIONS
If the hamstrings feel quite tight, or if you’re unable to sit up straight (the spine is rounding), place a blanket or block beneath the hips. Add additional support if necessary until both the legs and spine can be straightened.
If reaching the toes is challenging or makes you feel crunched, use a strap or towel. Pull the strap with your arms, resist with your feet. This will allow you to feel the interplay between the actions of the arms and the legs that allows the spine to lengthen and the chest to remain full. Otherwise, if you strain yourself to reach the toes, you will likely not be able to find or appreciate the subtleties of the posture. Alternatively, reach to the shin (but do the same pulling action) instead of using a prop.
If you feel like you’re tipping over to one side—towards the straight leg—place a block or blanket only under the hip of the straight leg. Use enough support that the pelvis feels level. You need to be able to find a sense of rootedness or heaviness through the sitting bone on the bent-knee side.
If you have had knee injury or surgery, and/or feel a pinching sensation when the knee is closed fully in this way, place a rolled up washcloth or piece of fabric behind the knee. When you squeeze the cloth with your knee, the bones of the femur and tibia will be held slightly apart. In the majority of cases, this alleviates or eliminates any pinching sensation or pain. The more severe the injury, the greater amount of cloth should be used. The support can be reduced over time as the joint heals. It’s also helpful when recovering from a knee injury to sit up higher using blankets.
COMMON MISTAKES
The most common mistake is not using one of the alternatives listed above when it is necessary to do so.
If you are fairly flexible—able to have both sitting bones on the ground without props—be sure that you’re not leaning towards the bent knee, or curving to the side. Keep your weight equal between the sitting bones, and make sure both legs are participating in the combination of strength and lengthening required of them.
“If you feel like you’re tipping over to one side—towards the straight leg—place a block or blanket only under the hip of the bent knee. ”
– it seems to me like this is suggesting the support goes under the wrong leg. Could you clarify on this please – is this an error or is it a correct modification?
No, you’re right, that is a typo. The support should be placed under the other hip. Thank you for pointing that out!