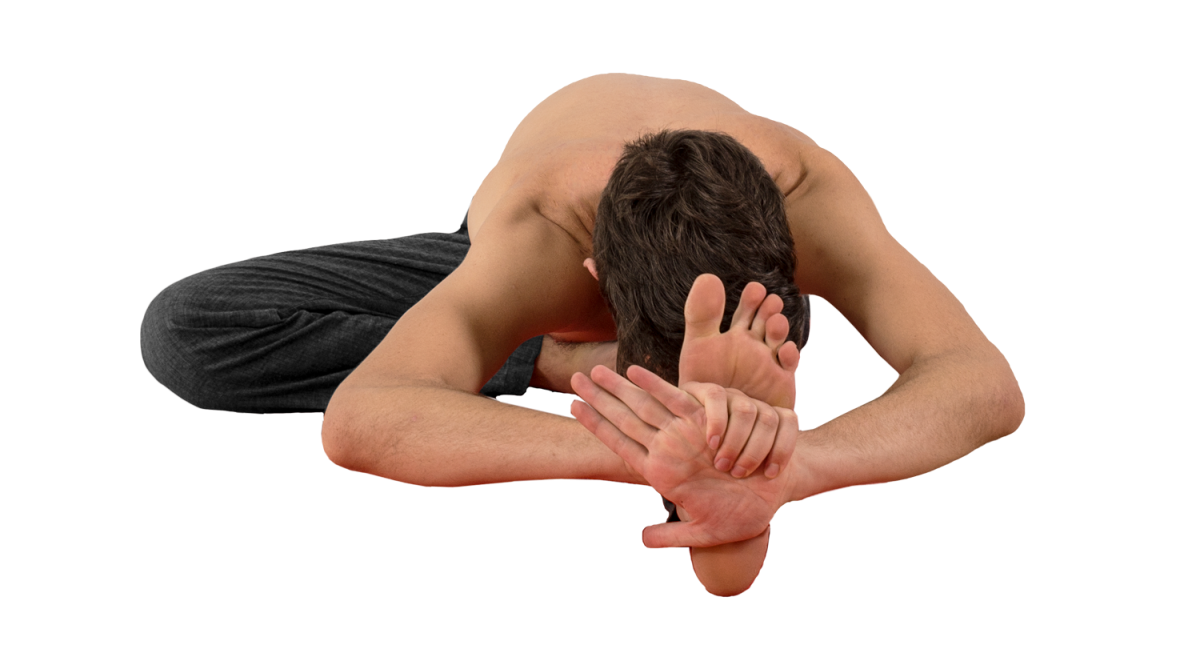
Janu Sirsasana A
- Janu: Knee
- Sirsa: Head
- Asana: Pose
Janu Sirsasana A is the eleventh pose of the primary series, and the sixth seated pose. There are three variations of Janu Sirsasana (A, B, C) which differ in foot placement.
The following is a discussion of the position on the right side, as pictured. As an asymmetrical posture, it must be repeated on the left side.
FOCUS ON…
Janu Sirsasana is a “hip opener,” lengthening the muscles of the inner thigh and groin. The action of the straight leg is that of Paschimottanasana, while the action of the bent leg is to rotate externally at the thighbone (similar to that of Trikonasana). This serves to create freedom in the pelvis, by fostering mobility in how the thighbone can move in relation to the pelvis. “Stiffness” can be thought of as a lack of potential movement of the thighbone in the hip socket (acetabulum).
Keep the hips facing straight forward (neutral, or in the same position as Samasthiti/Dandasana). It is very common for the hips to turn toward the right as the right leg is tucked into position, which creates significant distortion in this asana. This is especially common if attempting to make a 90° angle between the femurs. The right leg is anatomically incapable of being at a 90° angle in this position. Instead, allow it to be 60-80°, as much as the shape of your pelvis allows. The angle may increase slightly over time.
There is a slight twisting action in the torso: wrap the length of the spine from root to crown to address the straight leg fully. There can be a tendency for the body to be slightly twisted, drawn back toward the right side, which should be avoided. This is not a posture dedicated to twisting; a ‘counter-twist’ is simply needed to keep facing straight forward.
To enliven the asana, make sure you press the sole of the right foot into the right leg firmly. Though it may be tempting to passively “stretch” and let gravity take over, that is a much less effective strategy. Passive feet and legs are sure signs of vacant asana.
Principles of Forward Folding:
Vinyasa of the Pose
From Sat, jump through and land in Dandasana.
Inhale, bend the right knee into the chest, then open it out to the side; press the thigh and knee firmly into the ground. Press the sole of the right foot into the left thigh. Reach the both hands up and lengthen the abdomen and torso.
Exhale, fold forward and, holding your right wrist, place the hands against the sole of the left foot with the palms facing away from you.*
Inhale and reset, tugging with the strength of the shoulders to pull the chest through the arms, straightening the spine.
Exhale, fold forward fully. This is the state of Janu Sirsasana A; hold for five breaths. Focus on external rotation of the right femur, internal rotation of the left femur. This dynamic encourages movement and awakens the hips.

Inhale, sit up and release both hands, placing them to the sides of the hips.
Exhale, jump back and take vinyasa.**
Repeat for the second side.
*Binding the wrist is the preferred method. Alternatives are listed below; if you can hold the wrist, bend the elbows more and more as you gain flexibility to help the torso lengthen.
**Traditionally, vinyasa is taken between sides of asymmetrical postures. If you’re just starting out and building stamina, or have time constraints and require a faster practice, the vinyasa between sides may be omitted
ALTERNATIVES & SOLUTIONS
If the hamstrings feel quite tight, or if you’re unable to sit up straight (the spine is rounding), place a blanket or block beneath the hips. Add additional support if necessary until both the legs and spine can be straightened.
If reaching the toes is challenging or makes you feel crunched, use a strap or towel. Pull the strap with your arms, resist with your feet. This will allow you to feel the interplay between the actions of the arms and the legs that allows the spine to lengthen and the chest to remain full. Otherwise, if you strain yourself to reach the toes, you will likely not be able to find or appreciate the subtleties of the posture. Alternatively, reach to the shin (but do the same pulling action) instead of using a prop.
If you have had knee injury or surgery, and/or feel a pinching sensation when the knee is closed fully in this way, place a rolled up washcloth or piece of fabric behind the knee. When you squeeze the cloth with your knee, the bones of the femur and tibia will be held slightly apart. In the majority of cases, this alleviates or eliminates any pinching sensation or pain. The more severe the injury, the greater amount of cloth should be used. The support can be reduced over time as the joint heals. It’s also helpful when recovering from a knee injury to sit up higher using blankets.
If your bent knee doesn’t touch the ground, you might find it helpful to place a block under the leg so you can find the sensation of pressing down through the leg.
COMMON MISTAKES
Close the knee fully. If the knee is slightly open, for example if the foot is mid-thigh or at the knee instead of at the groin, an unhealthy shear force generated in the knee. This could lead to knee pain, and at the least it will prevent the knee from ever reaching the floor.
Twisting only the upper body or head towards the straight leg shows that the belly and hips are ‘dead,’ or not involved in the pose. Make sure to move from the very low belly.