Finishing Poses

Resting

Resting

Following Utpluthih, jump through and lay down on your back. There is no particular technique to follow here: just rest, this is not an asana. Do not try to control your breathing or bandha. Relax your feet and let them splay out to the side, let your palms face upward. Close your eyes. Beyond this, just lay there and enjoy the residue (shesha) of practice. Stay in rest for as long as you want. At minimum, allow for 5-10 minutes of rest. If circumstances allow, 20-30+ minutes can be very therapeutic. Beyond the simple harmony offered by laying around doing nothing, laying flat on the ground can provide therapeutic benefit to the alignment of the spine.


rest


Alternatives & Solutions

If laying flat on the ground isn’t comfortable, trying one or more of the following ideas:

  • Blanket beneath the pelvis
  • Blanket beneath the head
  • Block or bolster beneath one or both knees


Sometimes it is very uncomfortable to lay still. If this is due to emotional discord or a hyperactive mind, start small but slowly increase the amount of time spent. There is no need to try and clear your mind or feel blissful and tranquil. Just observe and hold your experience. It’s okay for it to be unsettling or uneasy. Yoga cannot occur while avoiding or rejecting experience, emotion, or thought.

Utpluthih

Utpluthih

  • Utpluthih: From Utplu, to rise or jump up.

In this and other flexion arm balances, it is common to see a lack of strength between the shoulder blades and ribs. Thus the torso can be seen “hanging” loosely off of the shoulder blades (which bear the full weight of the body) resulting in the shoulder blades pinching together and a deep depression between one scapula and the other. This can be remedied by drawing the shoulder blades around towards the sides of the ribs (protraction) and lifting the ribs up to fill the shoulder girdle. The process of strengthening may take some weeks or months, but don’t sidestep it.

From Padmasana, put your hands on the floor to either side of the thighbones. The hands should be about halfway between the hips and knees.

Inhale, push firmly into the ground and lift up. Round your back deeply and look forward. Make your breath and face as smooth and measured as possible. Hold for 25 breaths.

utpluthih-markup


Without setting down, exhale, jump back and take vinyasa.

Watch this video to see jump back from Lotus.

Alternatives & Solutions

To do this without Lotus position, cross the legs and squeeze the knees towards each other and towards the chest as much as possible. Without lotus, it’s much the same as lifting up to take vinyasa. Actually, it is much easier to lift yourself while in the lotus position than unbound.

If the body will not lift off the floor, follow these steps with a few weeks of practice between each step.

  1. Place blocks under the hands for a couple weeks.
  2. Don’t use the blocks anymore. Lift the hips off the ground, but keep the feet touching lightly.
  3. With the hips off the ground, lift one foot up.
  4. Lift the hips & both feet.

Can’t hold for 25 breaths:

Take it in a 2 cycles of 12 breaths each, or 5 of 5 breaths. Make your rest period between each lift as short as possible.

If in lotus, but can’t jump back:

Set down after 25 breaths, walk your hands forward so you’re on your hands and knees (still in lotus). Make sure you’ve walked forward enough that you’re leaning forward and there’s not much weight on your knees. Tuck your elbows under your body and lift the lotus up (similar to mayurasana), then untuck the legs midair and land in chaturanga.


Padmasana

Padmasana

  • Padma: Lotus
  • Asana: Pose

Padmasana is one of the classical and literal “asana,” which means “seat.” It is considered the finest meditative posture. Personally, I find one of its primary benefits to be that it is the only seated posture I have found in which there is no pressure on the spine—the weight of the body is on the thighbones, not the pelvis. Allowing the spine to “float” in this way helps prevent back pain during extended meditations. (However, there is an acclimation period of the legs “falling asleep.”)

This is one of several important asana in which the bandha can be most manifest and strongly felt. While you are in this position, focus on the interaction of the breath with the three areas of the bandha. The lessons learned here by careful attention can be applied with immense benefit to the other asana. (The other kingpin asana for cultivation of the bandha are Adho Mukha Svanasana and Dandasana.)

Oftentimes, the entire spine moves as if one unit. When uniting the chin and the sternum in this position, or other asana with this full expression of jalandhara bandha, move the head while keeping the rest of the spine still and stable.

Vinyasa of the Pose


Inhale, sit up from Yoga Mudra.

Exhale, touch the tip of the thumb and forefinger and place the wrists on the knees. Straight arms; push gently downward to encourage the heart to rise. Take the chin forward and down toward the chest, and lift the heart to meet the chin. Lifting the heart is important—if you just take the chin down towards the chest, you’ll end up slouching and slumped forward. Take 25 breaths in this position.

padmasana-sidepadmasana

Lift directly to Utpluthih on an inhalation—no vinyasa between.

Alternatives & Solutions

If lotus is not practical, sit cross-legged; the rest of the pose is the same.

I frequently see spinal misalignments in this asana ranging from excessive flexion (hyperkyphosis), to the opposite of excessive extension (hyperlordosis) or leaning forward.

To get a vertical, neutrally sinuous spine, sit in lotus with your sacrum touching a wall. Several vertebrae in the upper back (approx. T8-T11) should touch the wall. The lower back should not touch the wall. Lower the chin and raise the sternum without moving the rest of the spine from this position.

Sirsasana

Sirsasana

  • Sirsa: Head
  • Asana: Pose

FOCUS ON…

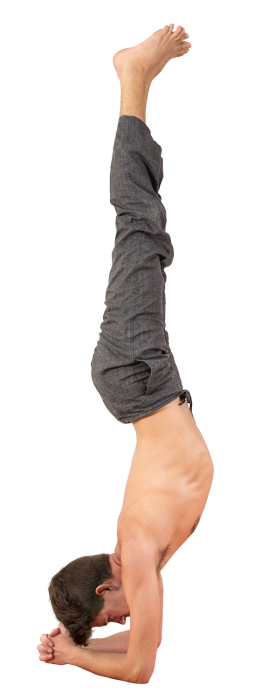
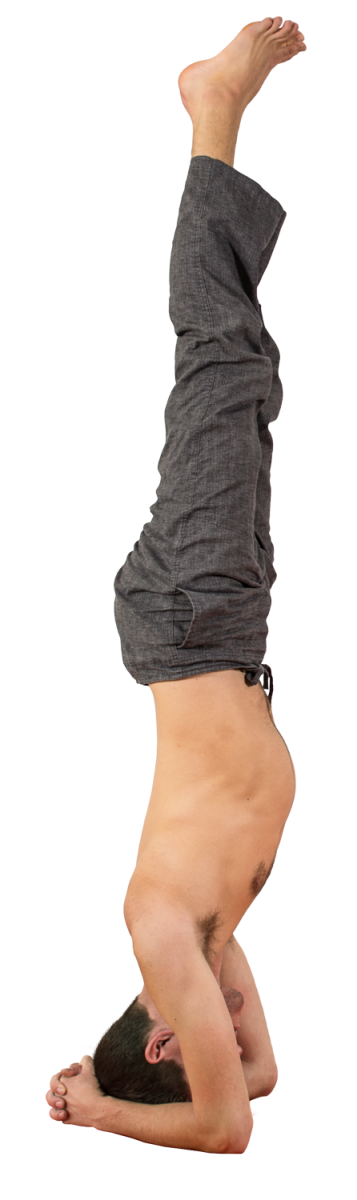
It is important that the weight of the body be borne on the forearms, rather than on the head. This means that careful alignment, control, and shoulder strength is necessary. As one of the final postures of the series, the practitioner should have developed sufficient strength by the numerous repetitions of lifting up and jumping between various asana. Though this is a beneficial pose for all practitioners, it should not be approached before the time is right: beginners ought to wait several months before incorporating this asana unless they possess significant preexisting shoulder strength.

The positioning of the hands in this style of headstand is the best for beginners. Though it has become vogue in some circles for beginners to try “tripod” headstands because of perceived ease, there is greatly increased risk of injury to the neck if the weight of the body is on the cervical spine. However, over time and with diligent practice, the muscles of the neck do strengthen, and in fact, the bone density of the cervical spine increases. (This increase in bone density may help to prevent the extremely common spinal microfractures that affect the majority of elders.) We see the appearance of headstand variations that increase the amount of weight on the head at the end of the 2nd series, at which time the practitioner has had adequate time to become comfortable, strong, and competent in the Sirsasana position.

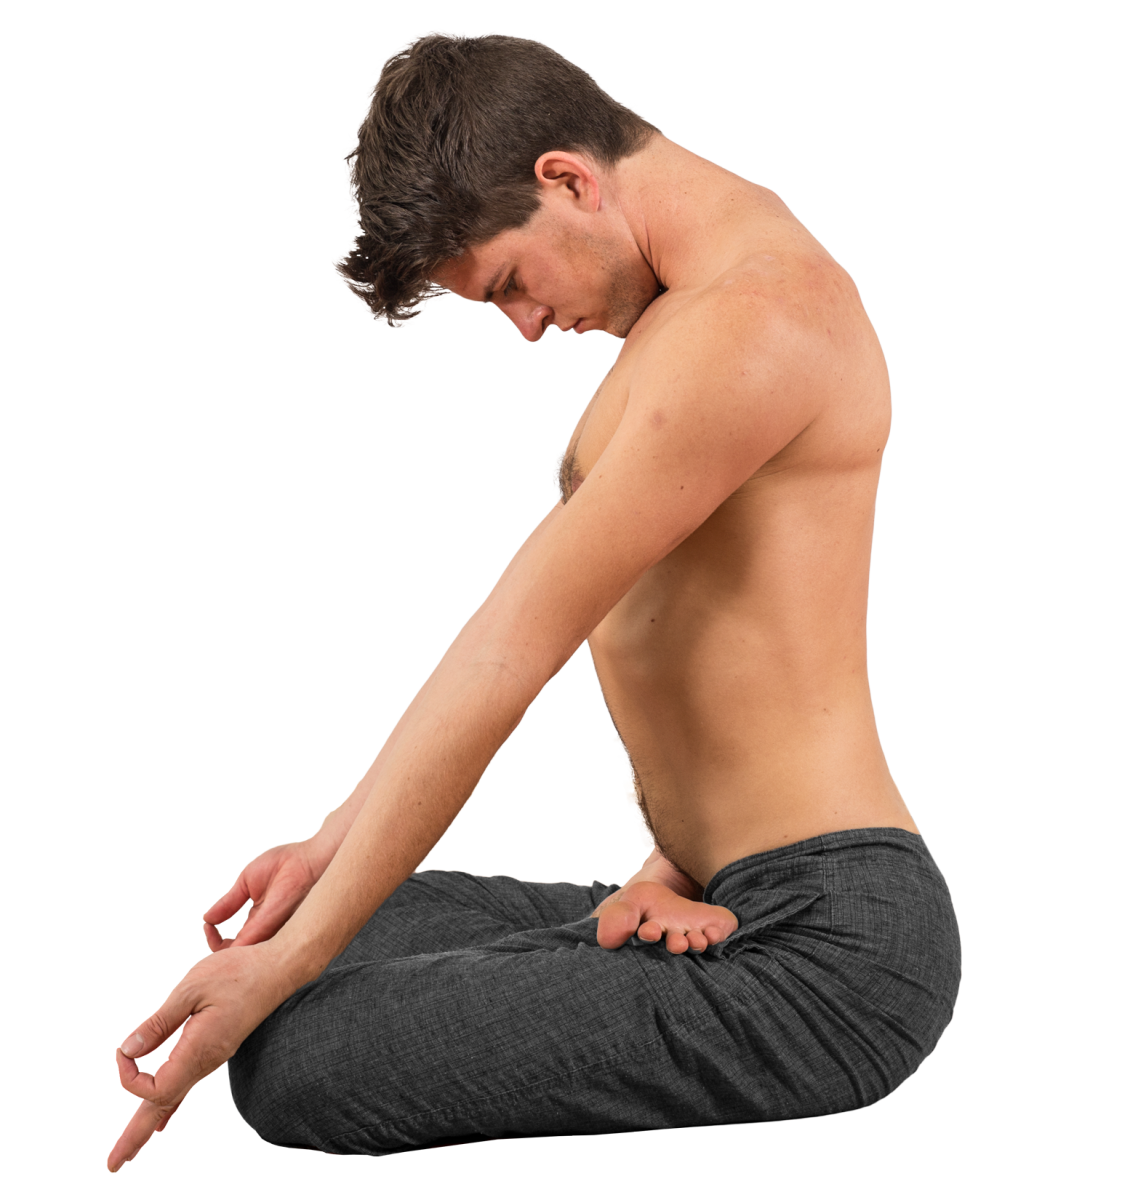
To find the correct hand, arm, & head position:

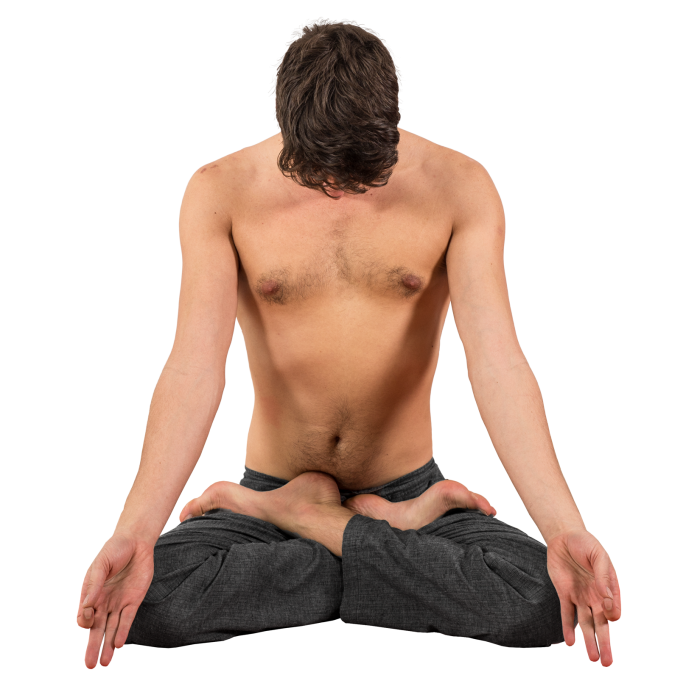
Wrap each set of fingers around the opposite elbow. This creates a fairly equilateral triangle between the hands and elbows. Watch out for the prevalent tendency of the elbows to slide farther and farther part, which creates trouble in maintaining strength and balance.

sirsasana-elbows

Keeping the elbows in place, bind the hands firmly together. Fingers interlaced, palm to palm. Tuck the bottom pinky finger inside your fist so it doesn’t get crushed. Many people try to lace the fingers but not put the palms together. Do not allow this! When the palms are not together, the forearms can rotate freely. They will rotate externally and prevent you from exerting strength.

sirsasana-hands

Place the head down so that it touches the wrists. When you’re lifted in headstand, pull the head into the wrists, not down into the floor. 

The head may contact the ground anywhere between the hairline and the crown of the head. Experiment and go with the position that feels most natural to you.
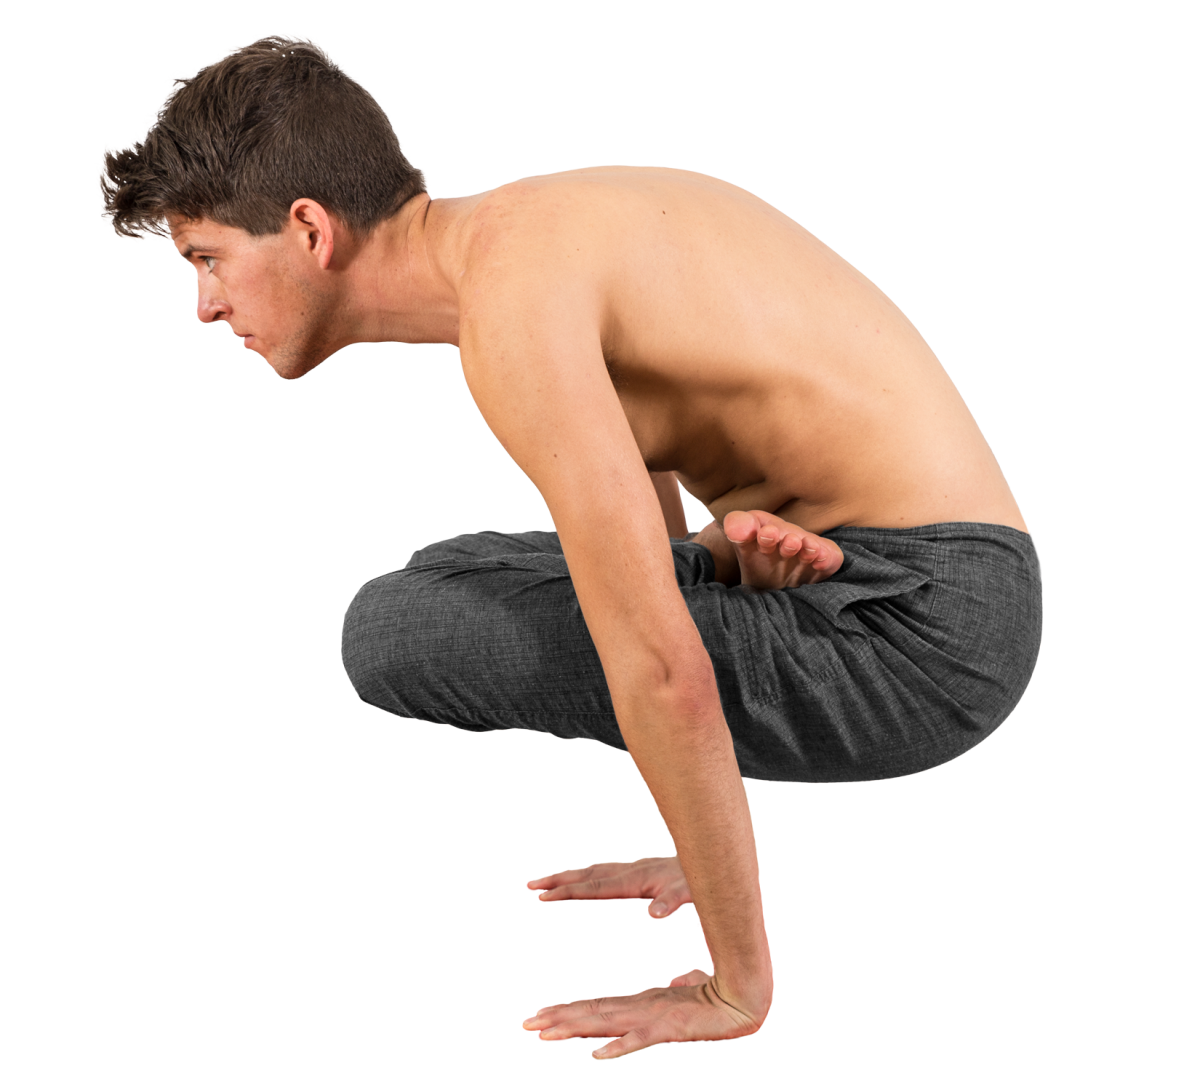
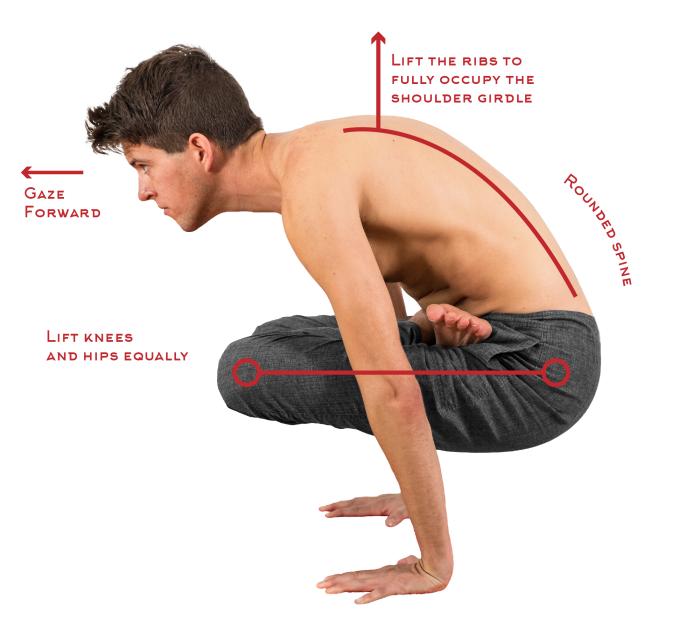
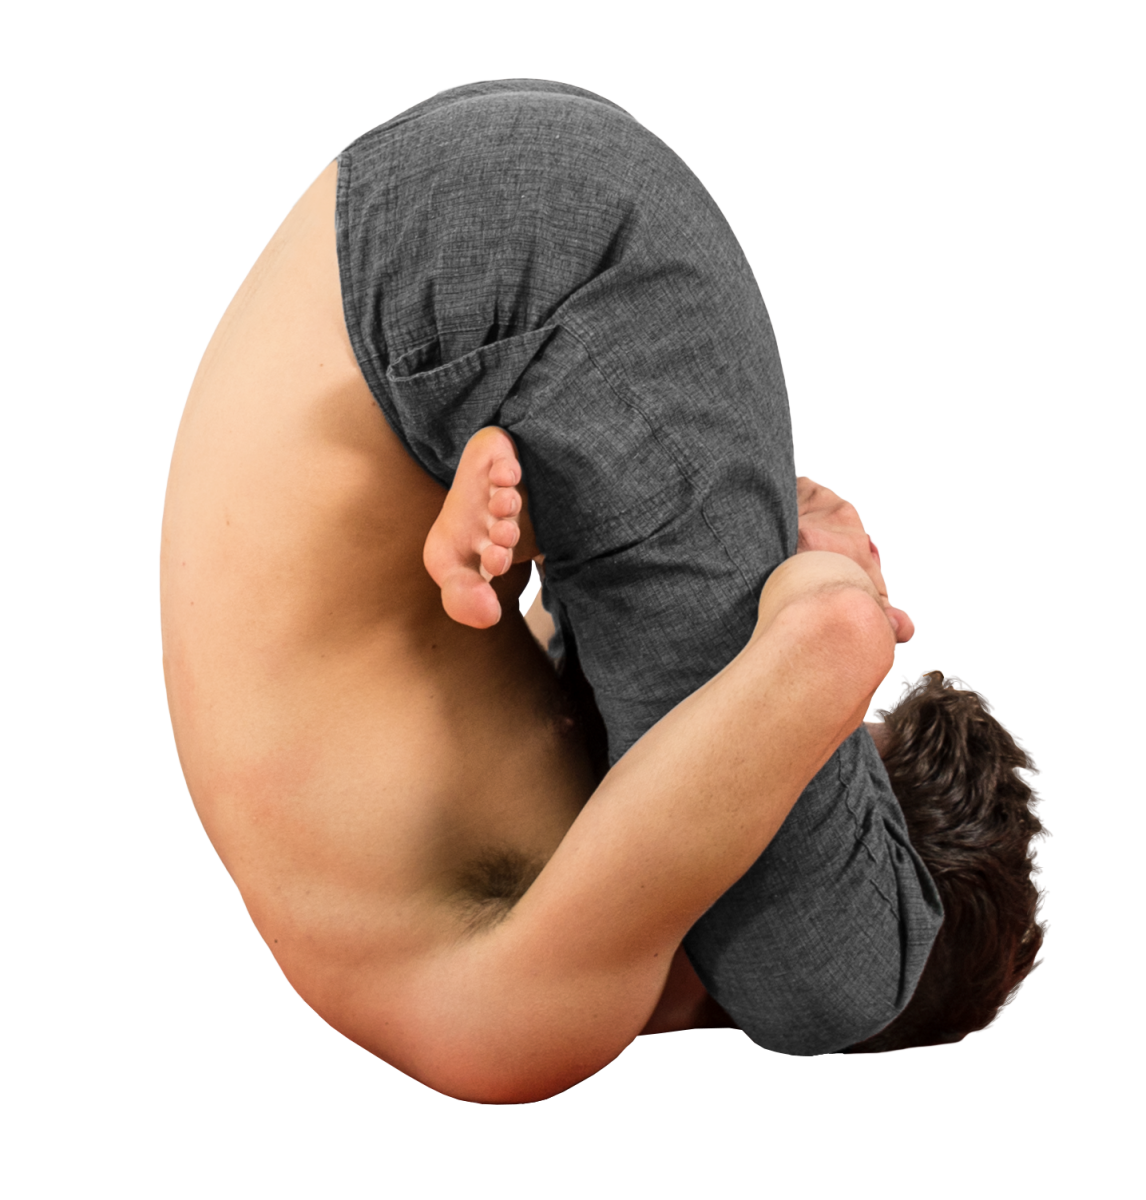
Lifting Up

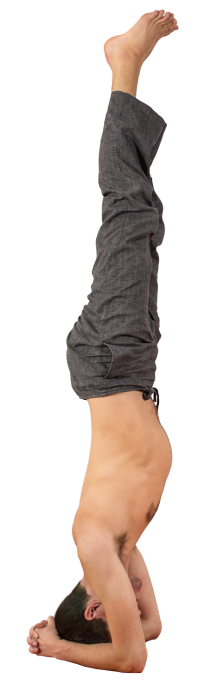
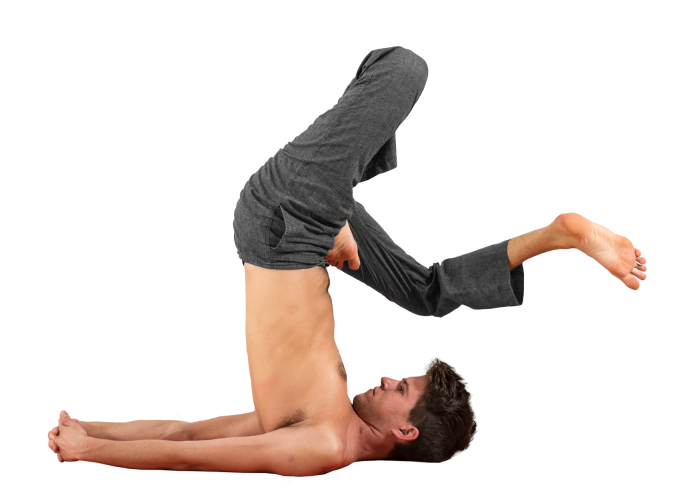
I highly advise against hopping, jumping, bouncing or springing into Sirsasana: LIFT BOTH LEGS SIMULTANEOUSLY WITH CONTROL. 

Do not focus on the legs. Though it may seem that getting the legs straight up is the course of action here, that is a misdirection.

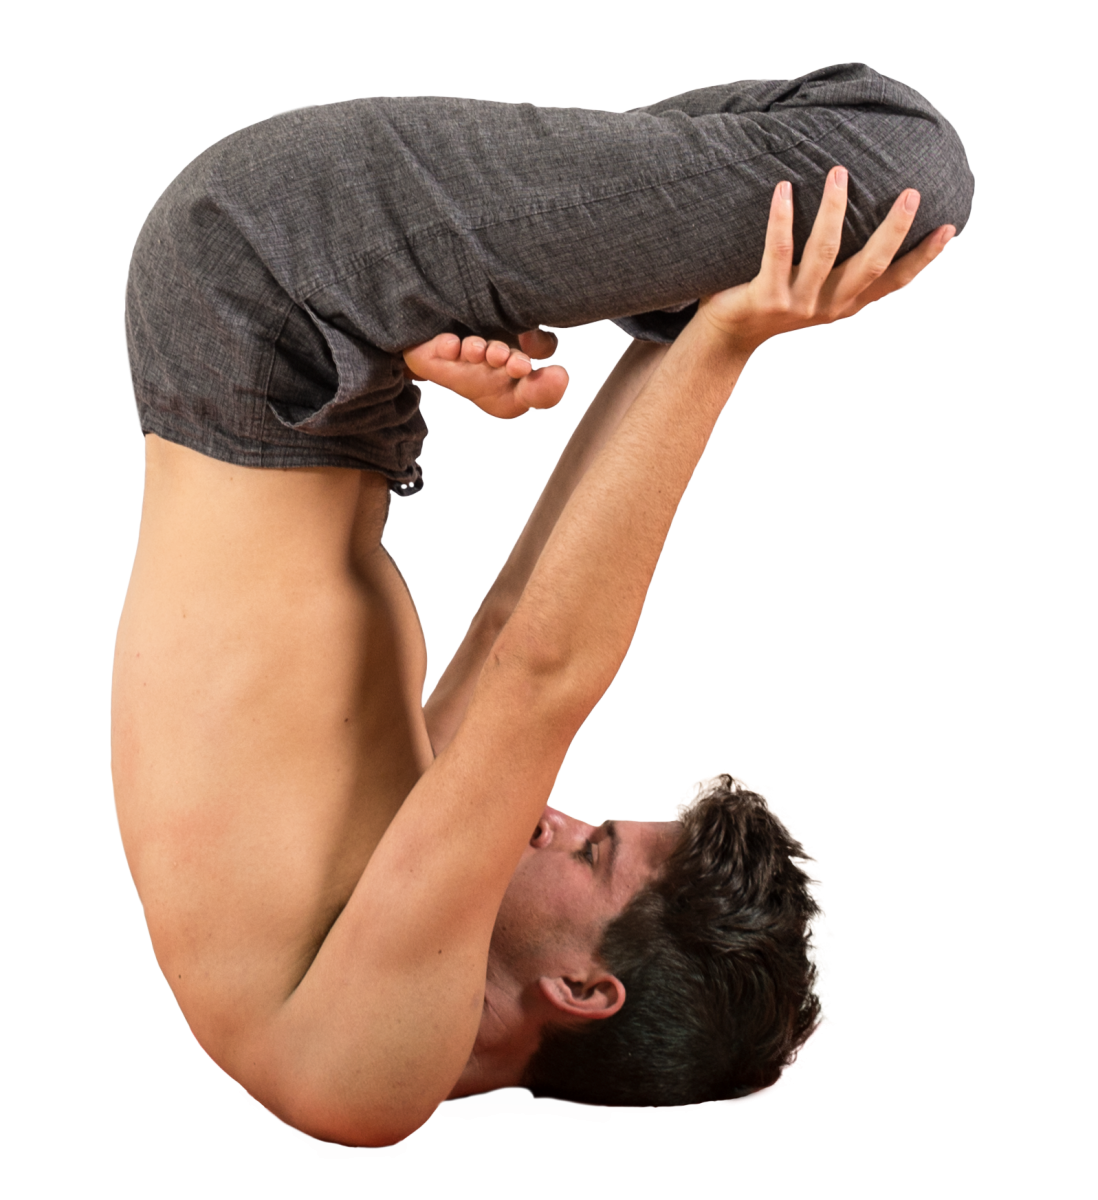
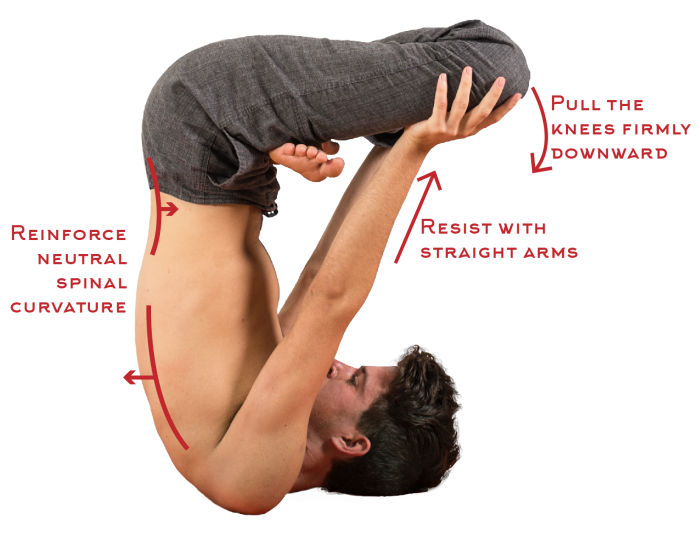
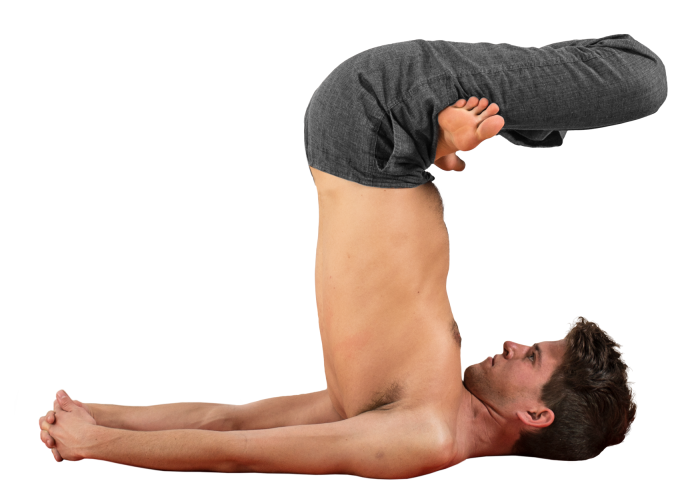
Focus on your spine and make the action of backbending: contract the muscles along the spine. The pelvis will begin to tip anteriorly. This action will make the legs weightless and lift up effortlessly.

If possible, keep the legs very straight and enthusiastically active the entire time. The less the legs move around or wobble, the easier time you will have both lifting up and balancing in the final position.

Troubleshooting

Having trouble with headstand? I see two common obstructions that hold students from Sirsasana:

  • Hands won’t stay together, elbows won’t stay put, arms don’t make a firm foundation ⇒ Lack of arm/shoulder strength
  • Can’t lift up with control ⇒ Hamstrings are immobile, or lack of spinal muscle strength

In either case: Stop trying to do Sirsasana! Keep working on Primary series to solve the aforementioned problems. This isn’t a good asana to be ambitious with; it will be easily within reach once the prerequisites have been mastered. There is no reason to do it poorly, especially since the risk of injury is high if done improperly.

Vinyasa of the Pose

From Adho Mukha Svanasana, lower the forearms to the ground. Bind the hands and place the head.

sirsasana-prep

Inhale, lift up.

Hold for 25 breaths.

sirsasana

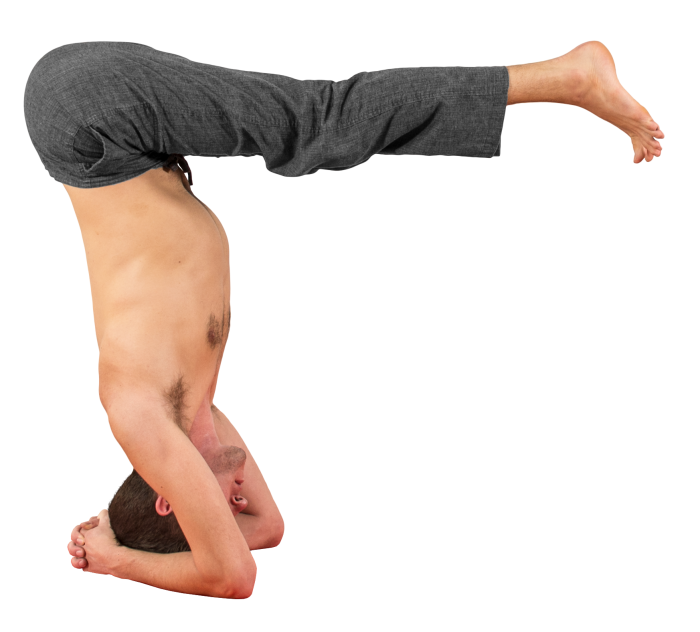
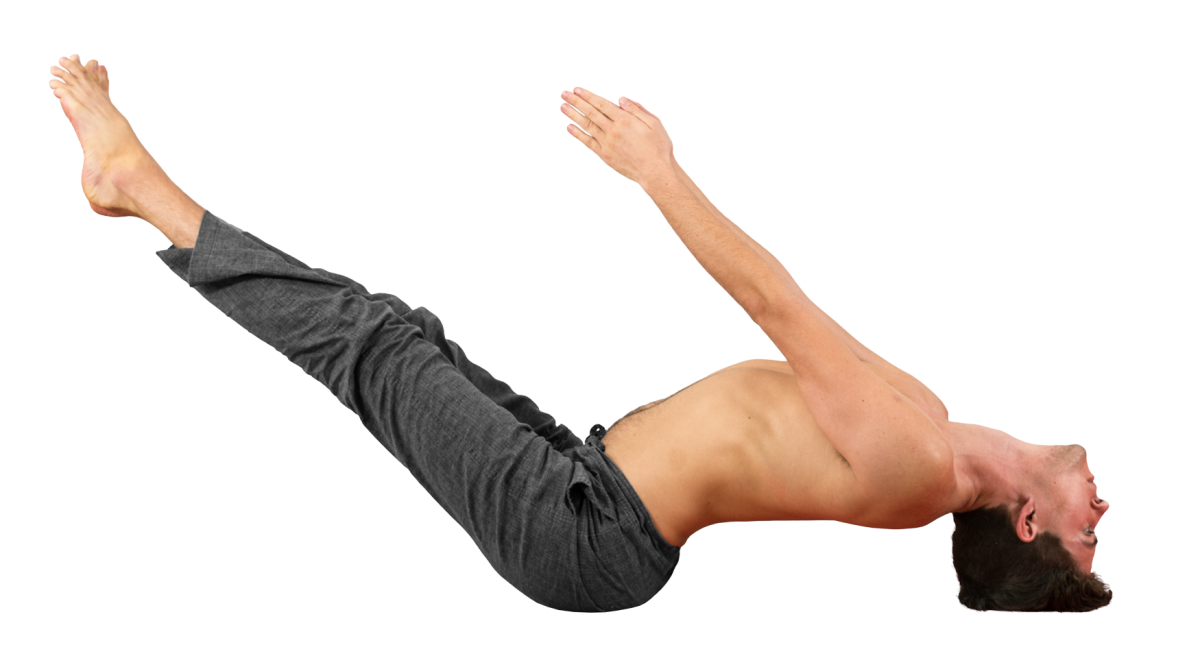
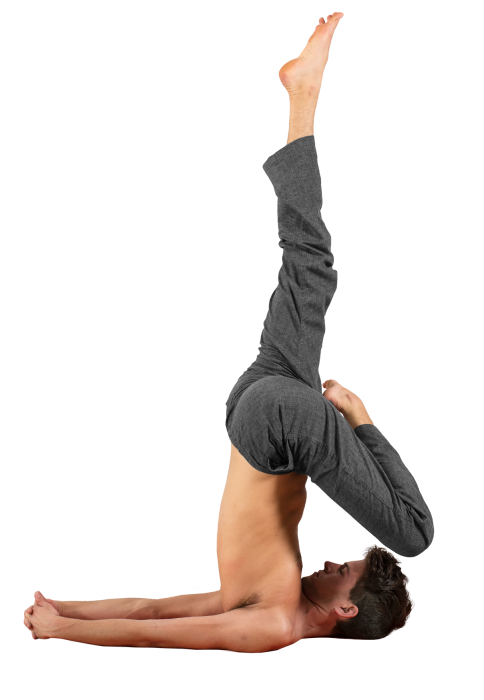
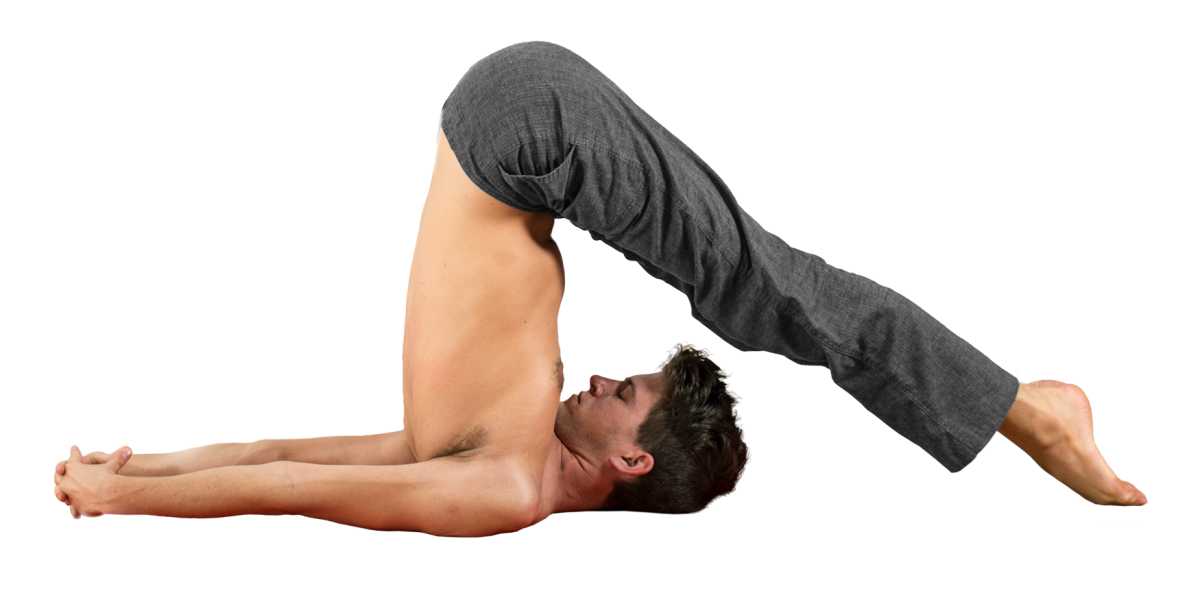
Exhaling, lower to Ardha Sirsasana (aka Urdhva Dandasana) for 10 breaths.

ardha-sirsasana

Inhale, return to Sirsasana. Lift the head off the ground and hold for 10 breaths.

sirsasana-lift

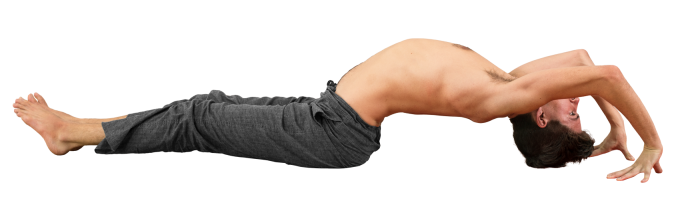
Exhale, gently set the head back down. Slowly lower the feet to the ground.

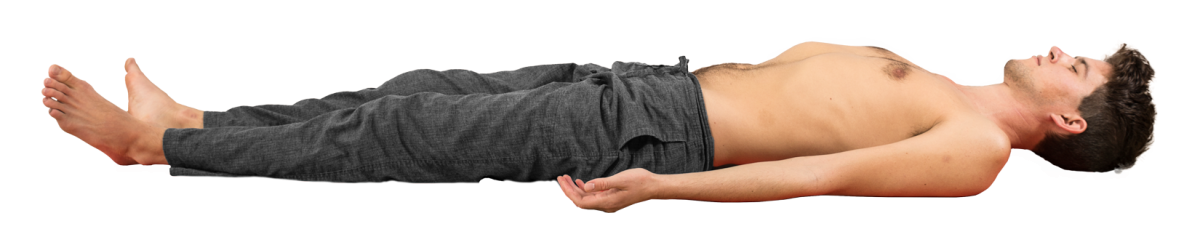
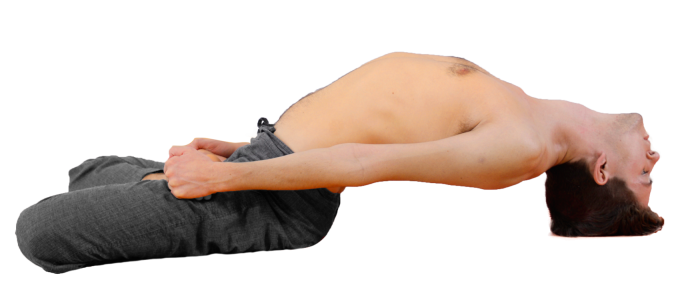
Keep the head on the ground, let the hips sink to the hips (Balasana). Spend 10 breaths here, or until you feel your blood pressure has equalized.


Sirsasana can be a pain in the neck if you rest primarily on the head and don't use the strength of the shoulders, engage the serratus anterior and use the legs and bandha to create lift. Keep the elbows squeezing toward the midline to engage the serratus, and keep the legs straight and strong to come up. The smooth, measured lift of the legs is a result of the pelvis rotating and finding the balance point where the legs feel weightless. Once you're up, protect your cervical vertebrae! The head should rest on the mat lightly so that no pressure is put on the neck. You know your neck is safe if someone could slide a sheet of paper under your head. When you get strong, balanced and integrated, add the challenge of lifting the head off the mat and bring your chin to your chest.

A video posted by Ashtanga Yoga Room (@yogawithgriffinamelia) on

Matsyasana

  • Matsya: Fish
  • Asana: Pose

 Vinyasa of the Pose

From Pindasana, lay the hands flat on the ground. Slowly roll down to a supine position, exhaling smoothly.

Inhale, press your elbows into the ground, arch your back deeply and place the crown of the head on the ground. Grasp the big toes, and pull on the big toes to encourage the fullest backbend possible. Keep the knees touching the ground.

matsyasana

Stay for 10 breaths, then transition directly to Uttana Padasana.

Alternatives

If lotus is not feasible, this pose can be done with the legs straight (this is preferable to cross-legged). Keep the hands in the lap, press the palms firmly into the thighs to encourage the lift and expansion of the ribs.

Urdhva Padmasana

Urdhva Padmasana

  • Urdhva: Upward
  • Padma: Lotus
  • Asana: Pose

FOCUS ON…

Many practitioners of Yoga find Padmasana to be at least temporarily inaccessible. In that situation, should this asana be done with the legs unbound, in a cross-legged position? Some teachers encourage it. I do not encourage or dissuade students from trying with unbound legs if lotus is impossible; personally, I think it feels very unstable without the lotus and I’m not sure the correct forces of motion can be brought into play without lotus. Try it for yourself and proceed in the most intelligent way.

When entering lotus, it is best to avoid using the hands as much as possible. If the action is done using the strength of the legs alone, the risk of injury to the interior structures of the knees greatly reduced. This is the easiest lotus position to enter without using the hands, so it is a good place to practice the action.

Once you’ve gotten yourself into the general shape of the asana, stabilize the body by pressing the knees into the hands and resisting with the arms. This will help keep you from tottering about, and additional help give leverage to maintain the neutral serpentine shape of the spine.

urdhva-padmasana-markup

Vinyasa of the Pose

From Karnapidasanainhale and lift your legs as if returning to Sarvangasana. Bind the legs in Padmasana position:
First, bend the right knee deeply while keeping the left straight. Place the right as close to the left hip crease as possible without using your hands.

urdhva-padmasana-entrance-a
Next, lift the right knee straight up and pull the left leg down towards the ground. This action will slide the right foot into place.

urdhva-padmasana-entrance-b

With the right knee lifted as much as possible, slip the left foot into the right hip crease.


urdhva-padmasana-prep-c

Place the hands on the knees. Press the knees firmly into the hands, and resist with the strength of the arms. This action encourages the uddiyana process.

urdhva-padmasana

Take at least 10 measured breaths here.

Enter Pindasana with no intervening vinyasa.

Karnapidasana

Karnapidasana

  • Karna: Ear
  • Pida: Pressure
  • Asana: Pose

FOCUS ON…

As with Sarvangasana, this is not a posture for beginners. The pose should not be attempted without stable and easy alignment in Supta KonasanaUbhaya Padangusthasana, and Urdhva Mukha Paschimottanasana, and experience with the full primary series.

The shoulders should bear the weight of the body in this posture, not the head or neck.

Vinyasa of the Pose

From Halasanaexhale and bend the legs and squeeze your ears with your knees.
karnapidasana

Take at least 10 measured breaths here.

Enter Urdhva Padmasana with no intervening vinyasa.

Halasana

Halasana

  • Hala: Plough
  • Asana: Pose

FOCUS ON…

As with Sarvangasana, this is not a posture for beginners. The pose should not be attempted without stable and easy alignment in Supta KonasanaUbhaya Padangusthasana, and Urdhva Mukha Paschimottanasana, and experience with the full primary series.

The shoulders should bear the weight of the body in this posture, not the head or neck.

The cervical spine should retain its gentle curvature, not flatten on the ground. Your teacher or a friend should be able to slide a hand under your neck. The action of this alignment is to drag the back of the head into the ground (towards the body) so that your chin lifts away from your chest.

There should be a space of a hand’s width between the sternum and chin at all times during this pose. 

Vinyasa of the Pose

From Sarvangasanaexhale and lower your feet to touch the ground. Lace the fingers together, and place the hands on the floor. Keep the legs very active and straight, pressing the tops of the feet into the ground.
halasana

Take at least 10 measured breaths here.

Enter Karnapidasana with no intervening vinyasa.

1 of 2
12