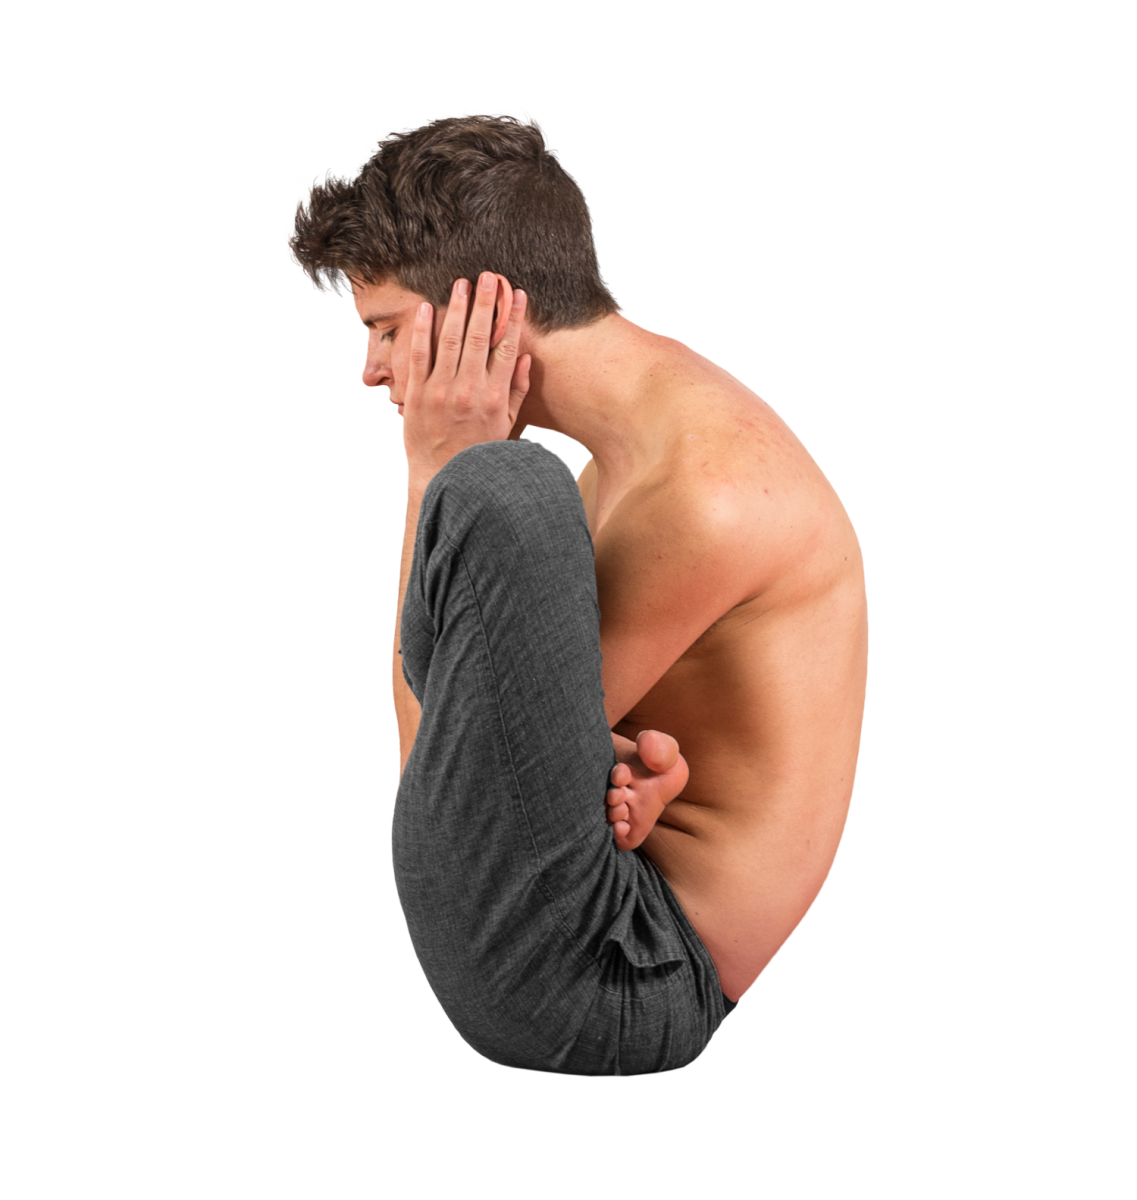
Garbha Pindasana
- Garbha: Womb
- Pinda: Embryo
- Asana: Pose
Garbha Pindasana is the twenty-second pose of the primary series, and the seventeenth seated pose. This is the fourth pose of what is often called the “apex” of the Primary series—five challenging asana in the middle of the sequence.
Garbha Pindasana is a dynamic asana, still for five breaths and nine breaths while moving. The practitioner rolls the length of the spine nine times, said to symbolize the nine months of gestation.
It requires a very specific strength of the deep low belly, and helps to massage and align the spine. Like all of the apex postures of the primary series, it is a deep spinal flexion.
FOCUS ON…
This asana can be performed either in lotus or unbound, with crossed legs. In either case, it’s important to keep the spine deeply rounded, in full flexion. Endeavor to bring the hands and the head together, and to keep the hands touching the head while you roll. This will not only make the movement smoother, preventing flailing and throwing oneself about, but also encourage deeper flexion (better roll), and most importantly, force the deep abdominal muscles below the navel to work. If the hands and the head are apart, it’s easier to use momentum, or to roll upright by jerking the limbs.
Unbound Form
From seated, cross the legs at the ankle. Flex the feet fully, “locking” them together, then create stability and strength by trying to actively abduct the legs/pull the feet apart. This helps to make up for the stability that would be gained from binding in lotus.
Next, reach between the legs and either (a) lace the fingers together around the feet or (b) grasp the ears or hair with your fingers.
Lotus Form
From seated, place the legs into lotus. Squeeze the knees together, tightening the lotus. Reach the arms through the legs until they have passed through the lotus just beyond the elbows. Then, rest the chin in the hands or grasp the ears or hair.
The initial position is to balance on the sacrum for five breaths, as close to the tailbone as possible. After five breaths, rock nine times, turning clockwise each time. Rock all the way to balance on your shoulders. Turn the pelvis slightly, twisting the spine, while on the shoulders in order to turn. If you’re grasping the ears or hair while upright, continue to hold while you rock. The hands should not be allowed to come away from the head as you rock. You will likely find this requires an additional, or different, strength.
Each rock should be a controlled alternation between being balanced on the sacrum and on the shoulders, rather than shallow rocks on the torso or overzealous, unbalanced attempts. Use the breath intelligently, exhaling fully and quickly as you rock forward, inhaling as you roll backward. “Control” means that you should be able to stop and balance at any time on either the shoulders or pelvis, and not to rely on momentum to complete the movement.
Vinyasa of the Pose
From Sat, jump through and land in Dandasana; inhale.
Exhale, place the limbs in either unbound or lotus form. Lift the legs and balance on the pelvis, as near to the tailbone as possible. Five breaths here.
Inhale to rock back, exhale to rock forward. Repeat nine times, turning clockwise in a circle.
Exhale rock forward; release the hands and transition to Kukkutasana.
ALTERNATIVES & SOLUTIONS
If you’re just beginning, and it’s challenging to coordinate turning in a circle while rocking, just rock forward and back without turning. After becoming familiar with the motion, try to incorporate the turn. It’s easy to get “stuck” on your back, or, in lotus, to accidentally roll over onto your side and get stuck. After practicing just forward-and-back for a couple weeks, you’ll be able to add the turn in. If you do find yourself getting stuck, try focusing more on moving with the flow of the breath and coordinating a strong exhalation with the rock forward.
It’s common when beginning this posture to have difficulty putting the arms through the lotus. You can do one side at a time by, from seated, placing the right arm in the crook of the right knee, then placing the right leg in lotus. Place the left arm in the left knee, then wriggle the left foot into lotus behind the right arm. I don’t recommend doing this for a long period of time, but it can help create additional space in the lotus.
Traditionally, the turn is performed clockwise only. However, you may wish to experiment with turning counterclockwise, as well.
While turning, you will likely roll off of your mat. If the ground hurts your spine, try placing two mats side-by-side for additional padding.
COMMON MISTAKES
Avoid rocking part-way up and down, rolling only on the mid-back.
If you’re prone to excessive lumbar lordosis, or anterior pelvic tilt, you might find that you’re “smacking” down rather than rolling. Try to emphasize posterior pelvic tilt; you can also try tucking the chin to the chest and grasping the top of the skull rather than the sides, which helps to flex the spine further.


[…] Garbha Pindasana (Embryo Pose) is my favorite pose! I have rolled around, collided with people, fallen apart, then pulled myself up, eventually laughed and smiled while building strength throughout it. […]