
Bhujapidasana
- Bhuja: Arm / Shoulder
- Pida: Pressure
- Asana: Pose
Bhujapidasana is the nineteenth pose of the primary series, and the fourteenth seated pose. This is the first pose of what is often called the “apex” of the Primary series—five challenging asana in the middle of the series.
It is the first arm balance in the primary series to be held for five breaths. Throughout the earlier parts of the sequence, strength has been developing by supporting the body on the hands during the jump forward and back, but this is the first named arm balance.
This pose is the summary and archetype of the primary series, encapsulating the lessons and actions that the series is constructed around: hip and hamstring flexibility, shoulder strength, and healthful spinal flexion.
A certain measure of hip flexibility is necessary to begin working into this asana. However, the name given this posture implies one of the main actions necessary: shoulder pressure, or, squeezing the shoulders with the legs. This dual necessity of flexibility integrated with strength of the inner thighs and low belly gives it a unique value amongst arm balances.
This pose has two versions: lifted, and bowed. The transition between the two variations is especially useful in developing coordination and strength.
FOCUS ON…
This posture has one of the most dramatic evolutions of any in the primary series. In the beginning stages, it is best to take this slowly, set up deliberately, and take extra breaths. After diligent practice, it becomes possible to maintain a more minimal breath count, and to jump fluidly into position. Be patient!
In either case, the most important part is to place the legs as high up the arms as possible, near or on the shoulders. Then, squeeze, round the back, and press the floor away. This creates lift—otherwise, the asana will be rather ‘flat’ and the feet will not rise far from the ground.
To this point, the practitioner has been trying to remove deep flexion from the spine, keeping it closer to neutral for forward folding. This is the first position of the primary series in which deep flexion is to be encouraged. This is the introduction to a family of arm balances in which deep flexion is necessary to more fully access the strength of the shoulder blades, lats, and side abdominal strength. Shallow flexion is called for in seated or standing forward folds because of the way that the lumbar spine transfers weight to the pelvis; too much flexion stresses the lumbar intervertebral discs. When the weight of the body is on the hands, deep flexion does not pose the same hazard. Indeed, the situation is reversed: deep flexion is necessary in order to maintain the health of the shoulder blades, thoracic vertebrae, and neck. Without full flexion, the body “hangs” off the muscles and ligaments that connect the shoulder blades to the ribs. With no bony joint, there is a greater risk of overstretching or hypertension (often manifested as rock-hard rhomboids and trapezius). Furthermore, the action of creating flexion creates stability in this pose, and prevents wobbling.
The deep flexion of this pose is especially strong during the initial jump, the lifted position, and jumping back. The upper spine is relatively straight in the bowed pose, though the lower back maintains flexion.
Other arm balances in this deep flexion family include the various bakasanas, tittibhasana, all forms of kukkutasana, karandavasana, galavasana, and utpluthih. Not all arm balances share this similarity, however.
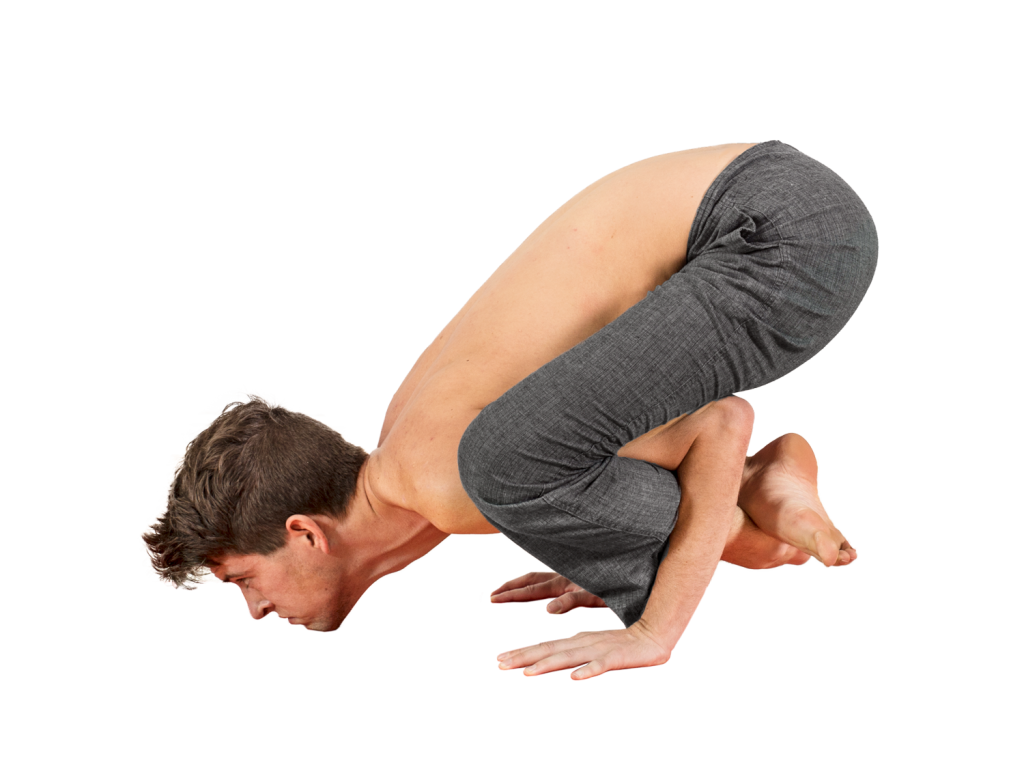
In the lifted version of Bhujapidasana, the arms are straight; they bend deeply in the bowed version.
Researching
For beginners, or for those who the bowed version is not appropriate, it’s a good idea to stay in the lifted version.
I will first discuss a method for stepping into the posture and working into it. Over time, integrate the traditional vinyasa count.
From adho mukha svanasana, (downward facing dog), bend the knees deeply, look forward past the hands, and crouch—as if a cat, ready to pounce. Bend and straighten the knees a couple times; try and feel the connection to the hips and pelvic floor.

Next, hop the feet wide to land in front of the hands. Jump as far forward as you can in order to get the knees high on the shoulders. It’s okay if the wrists come up off the ground a little (as pictured).

Next, sit back onto the hands, settling the weight into the fingers and palms. Try to avoid dead hands, which compromises the structure of the wrist and carpal tunnel. Bend the arms deeply, and “sit” across the upper arms. As you find your balance on the hands, wriggle the feet closer together until you can cross the ankles. It is worth the extra effort to cross the ankles. Leaving the feet uncrossed, even if they are touching, undermines the actions at work here.
Squeeze the knees into the arms firmly and straighten the arms to lift the feet. Round the back. To find the balance, you may need to explore the edge between keeping the pelvis so lifted that the feet are stuck on the ground and lowering the hips so much that you lose your balance and fall out of the posture. (Note the angle of the femurs—there needs to be a slight upward angle.)

And, voila! Bhujapidasana. Stay here five breaths, then either let the feet come down and ease out (shift your weight forward to come back onto your feet rather than crashing down onto your sitting bones), or work on jumping back. Alternatively, stay for five breaths, then work on lowering down and coming back up once or several times.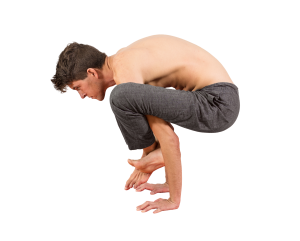
Vinyasa of the Pose
Note: the feet do not touch the ground at any point of the following vinyasa count.
From Sat, jump and land in the lifted version of Bhujapidasana.
Inhale, round the back and look forward.
Exhale, start to bend the elbows, and fold forward until the chin* lightly touches the ground. The feet will need to point in order to tuck back through the arms without touching the ground. This is the state of the pose; hold here for five breaths.
Inhale, lift back up.
On the same inhalation, straighten the legs.

Exhale, tuck the legs back to a bakasana-like position.

On the same exhalation, float back to catvari and take vinyasa.
*For those with a neck injury, or beginners, try placing the crown of the head on the ground instead.
ALTERNATIVES & SOLUTIONS
If you’re having trouble finding your balance, the hips are feeling a bit tight, or the wrists are inflexible/painful: experiment with placing blocks and/or a wedge under the hands.
It’s also worth getting into the “leapfrog” position, then sitting down on 2 bolsters. Try and lift up from there.
If you’re working towards lowering your head to the ground, you can place a bolster or block under the head. That way, you’ll have less distance to lower; just be sure you can lift back up.
If you’re having a bit of trouble jumping back, try tucking one leg back at a time. You can even lean a little towards the opposite side to get a bit of extra clearance.
COMMON MISTAKES
Shoulder blades pinching, or hanging in the joints. Looking down rather than forward.